This guide walks you through the steps to configure your shipping rate preferences when integrating EasyParcel with your WooCommerce store. You can choose how shipping rates are displayed to your customers during checkout based on your business strategy.
Step 1: Access EasyParcel's Plugin
If you haven't installed the EasyParcel plugin, learn how to integrate with EasyParcel here.

Step 2: Set shipping rate preferences
2.1: You'll be given three options for displaying shipping rates to your customers:
a. EasyParcel member rate
b. Add-on to EasyParcel member rate
c. Flat rate
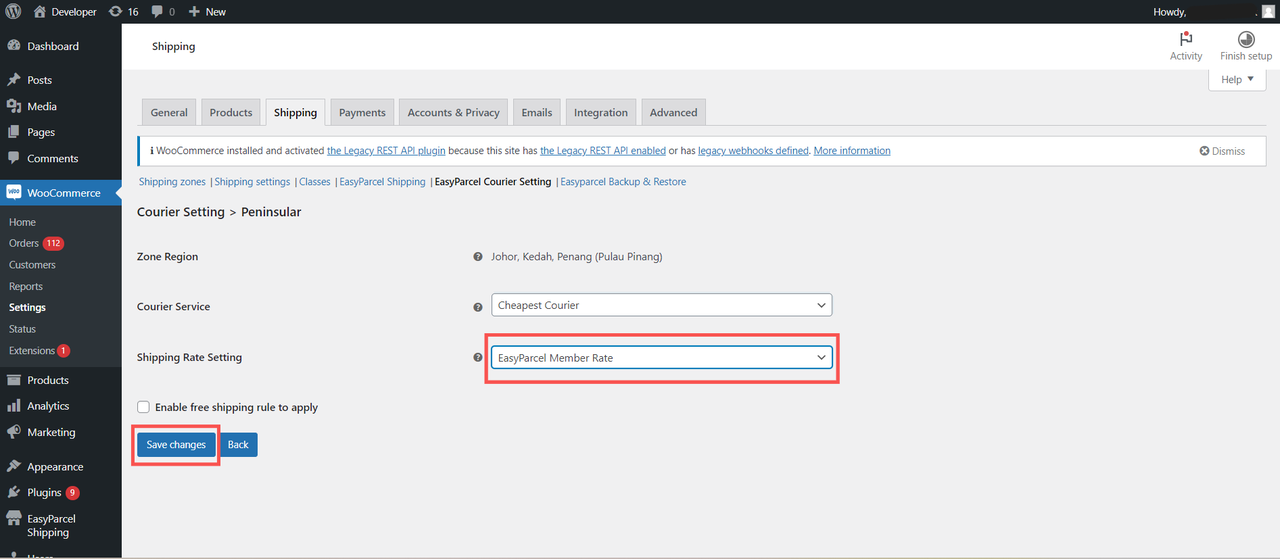
2.1a: EasyParcel member rate
Customers are charged based on your EasyParcel membership rate. Click Save changes once done setting.
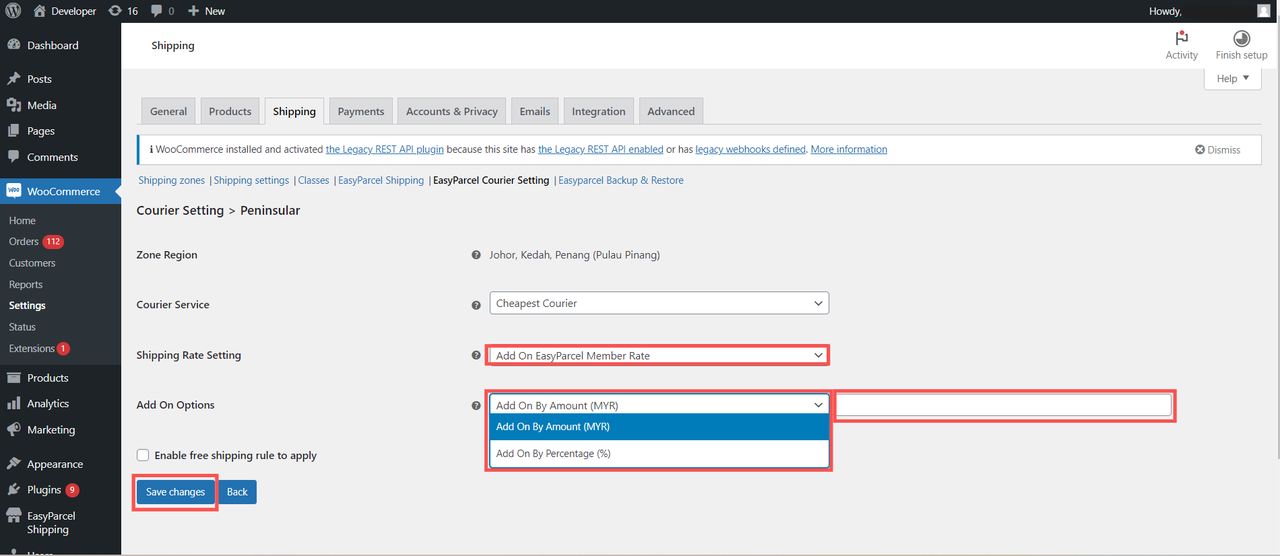
2.1b: Add-on to EasyParcel member rate
Add a markup on top of your membership rate. You can choose to add by amount or percentage, then enter the value. Click Save changes once done setting.
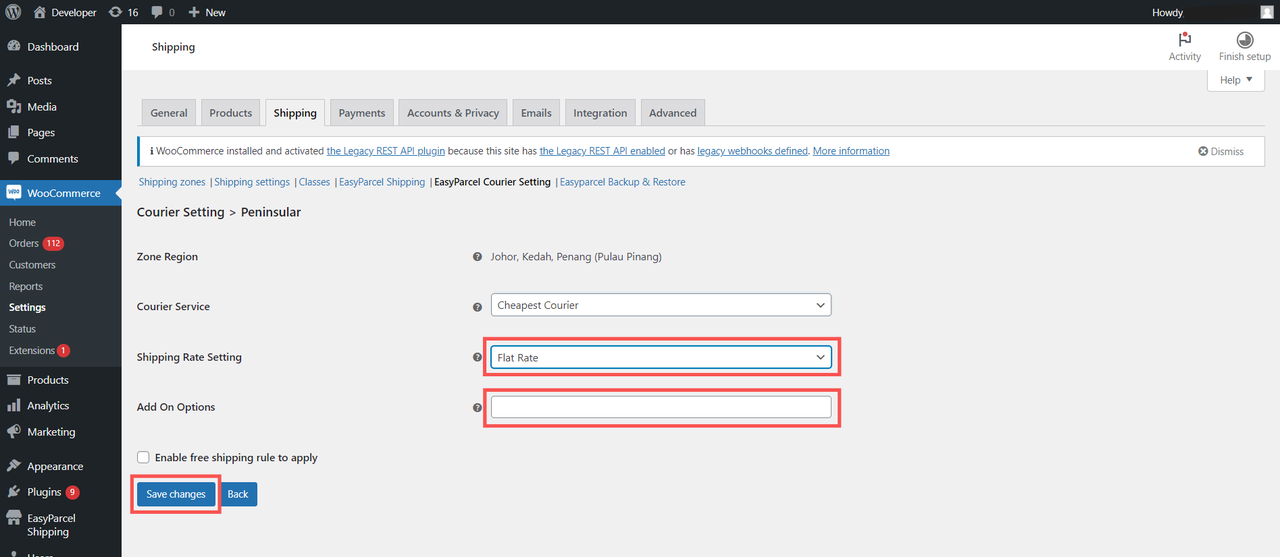
2.1c: Flat rate
Set a fixed shipping fee for all orders. Click Save changes once done setting.
Don't know how to fulfil WooCommerce orders via EasyParcel plugin? You may learn here.
And there you have it! You've just mastered integrating EasyParcel with WooCommerce. We're really excited for you! We hope this guide was helpful but if you still have questions, don't worry – we've got you covered. Check out our other articles or reach out to our friendly support team. We're happy to help you every step of the way!