Quick Summary
To display real-time rates, go to WooCommerce Settings > Shipping > EasyParcel Shipping to configure your details. Next, add EasyParcel Shipping as a method within your Shipping Zones and activate your preferred couriers under the EasyParcel Courier Setting tab. You can choose to show all available couriers, a specific provider, or the cheapest option automatically. This integration is relevant to Singapore merchants looking to provide accurate, weight-based shipping costs to customers during checkout.
We'll Cover:
1. Introduction
This article will explain how to set up live rates at checkout for your WooCommerce store using EasyParcel plugin. The destination address and the total weight of the parcels are used to calculate your shipping rate. So, your buyers can choose their preferred shipping method based on the type of courier services, and the order will be processed accordingly.
2. About EasyParcel plugin's live shipping rates at checkout
Live shipping rates are automatically calculated based on the destination address and the total cart weight. This allows buyers to select their preferred courier service at checkout. Once buyers place their WooCommerce orders, sellers can view their selected shipping method and also have the flexibility to set up their own preferred shipping methods through the EasyParcel plugin.
3. A guide to add live rates at checkout page for WooCommerce
If you haven't installed the EasyParcel plugin, learn how to integrate with EasyParcel here.

Step 1: Configure EasyParcel shipping settings
1.1: Go to your WooCommerce settings, click the 'Shipping' tab, then click 'EasyParcel Shipping'.
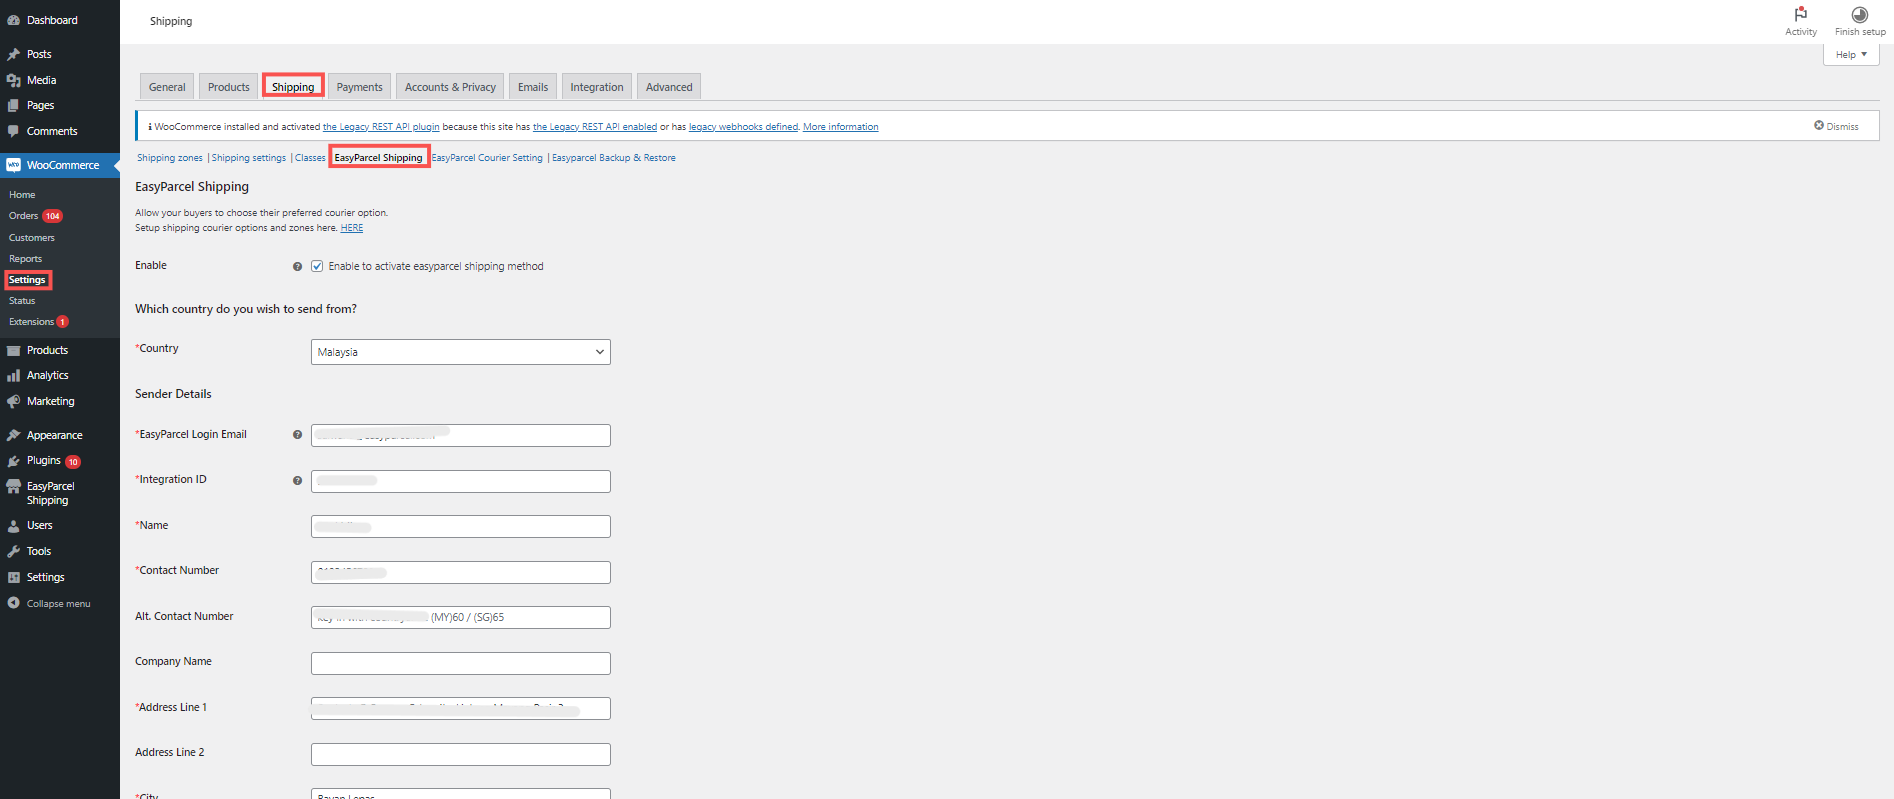
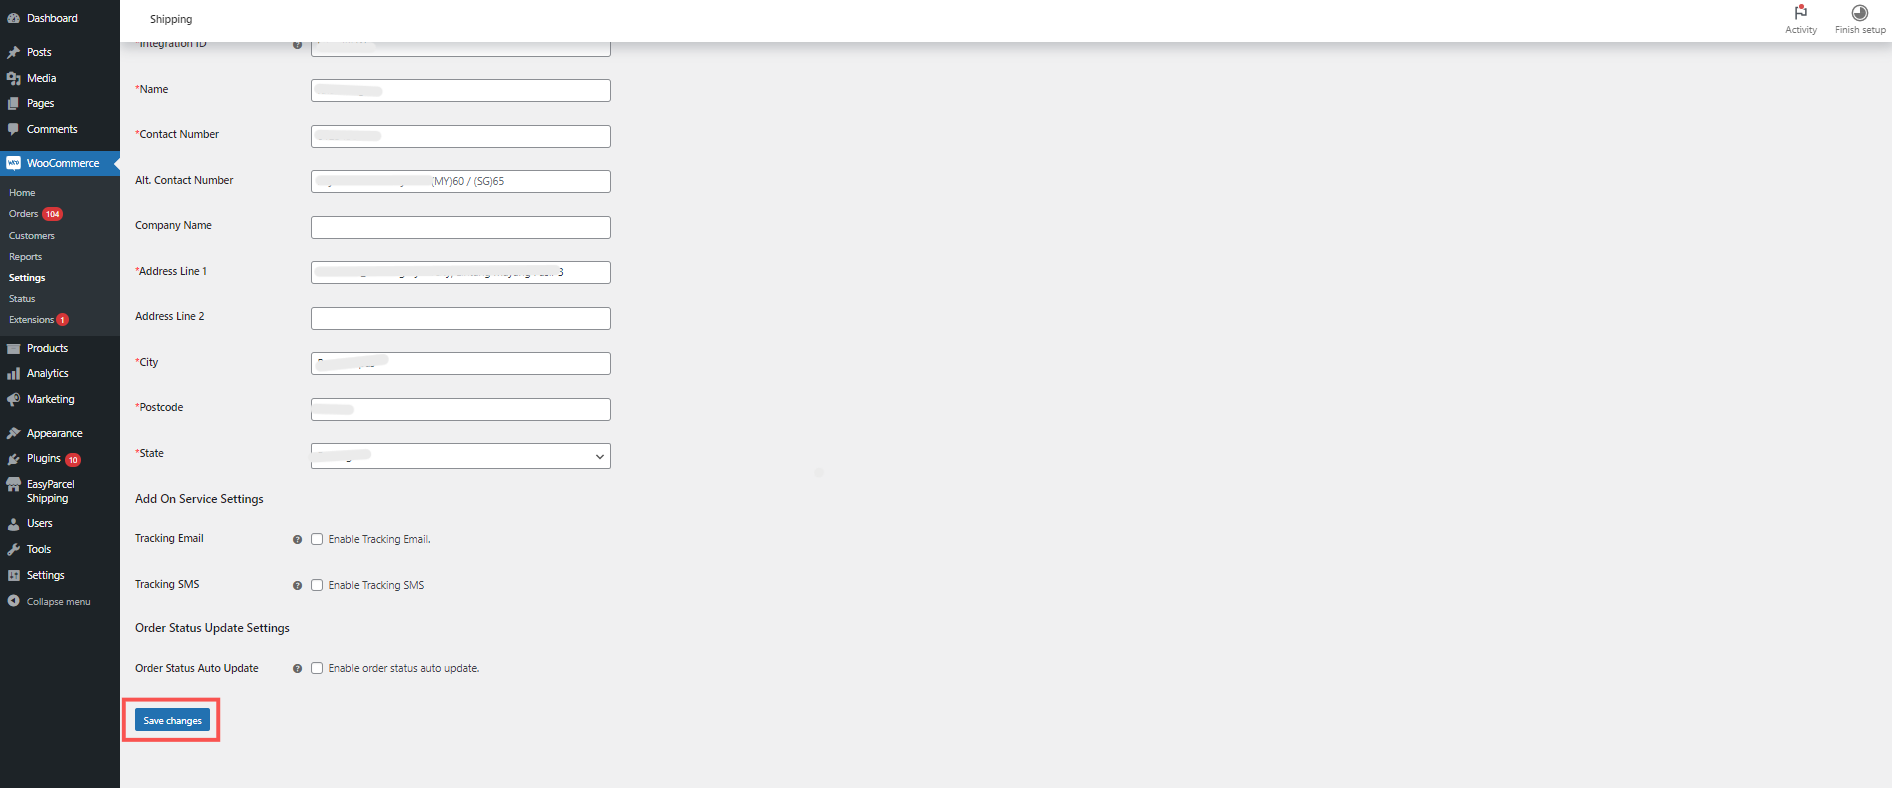
1.2: Fill in your details and click 'Save changes'.
Make sure your address is accurate, as the quote rates will be based on this information.
Step 2: Set up shipping zones
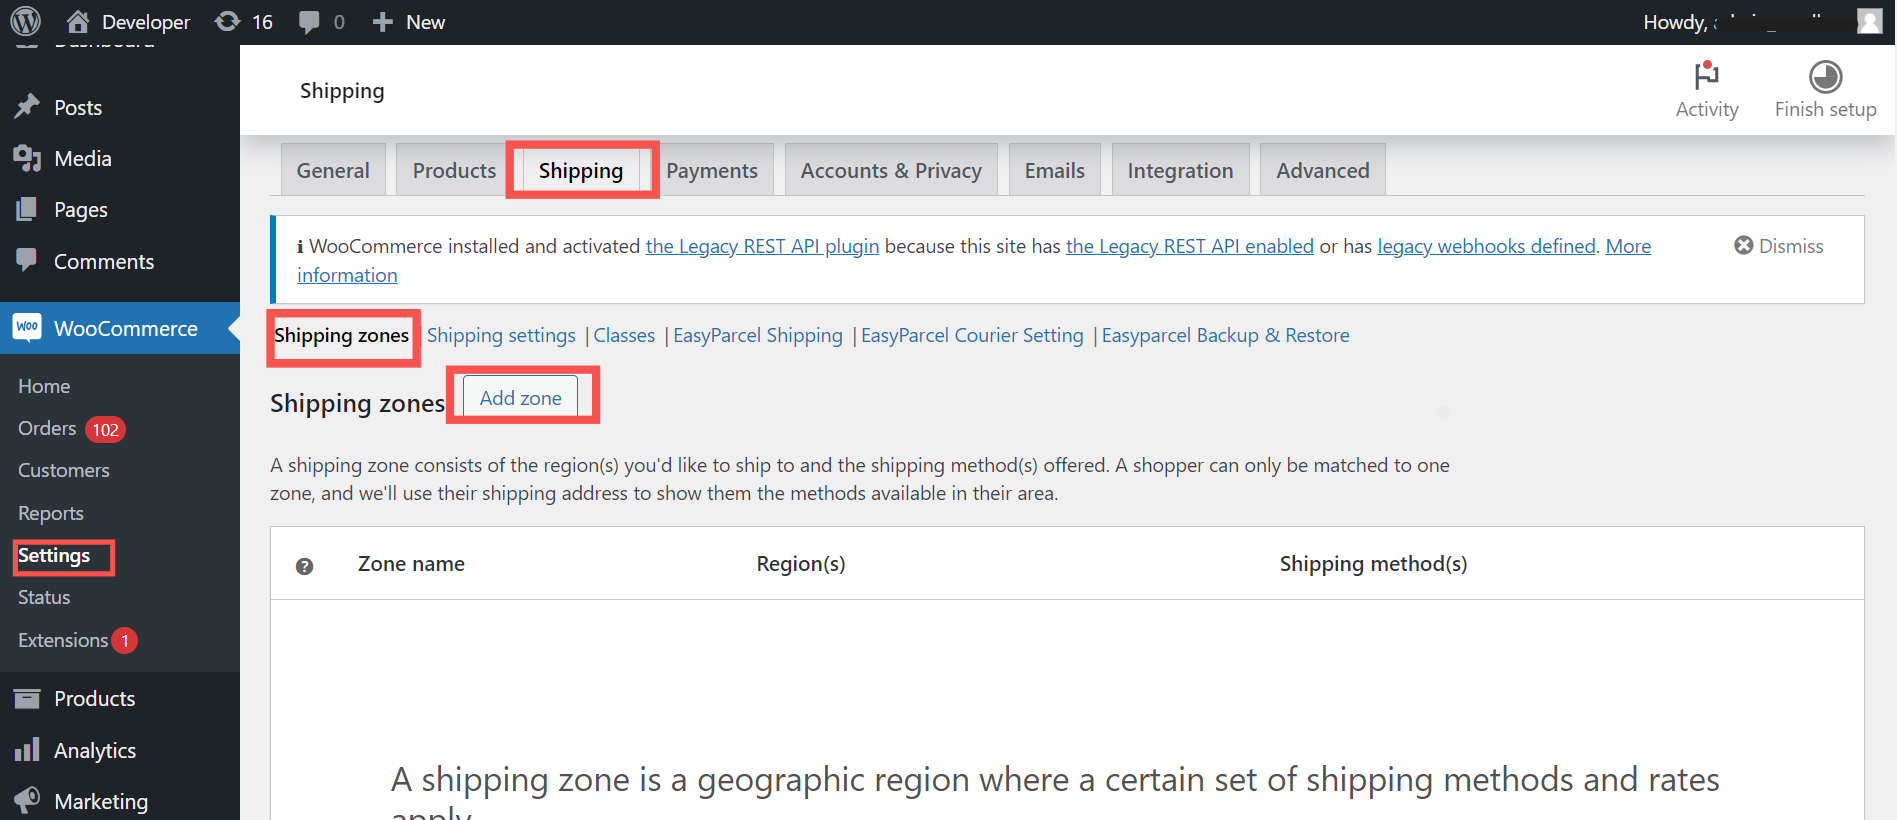
2.1: Under the ‘Shipping’ tab, click ‘Shipping zones’ > ‘Add zone’.
You can create multiple zones to classify customers by location (e.g. domestic vs. international), making checkout more streamlined.
2.2: Name your shipping zone, choose the regions it covers, and click ‘Add shipping method’.

2.3: Select ‘EasyParcel Shipping’ and click ‘Continue’.
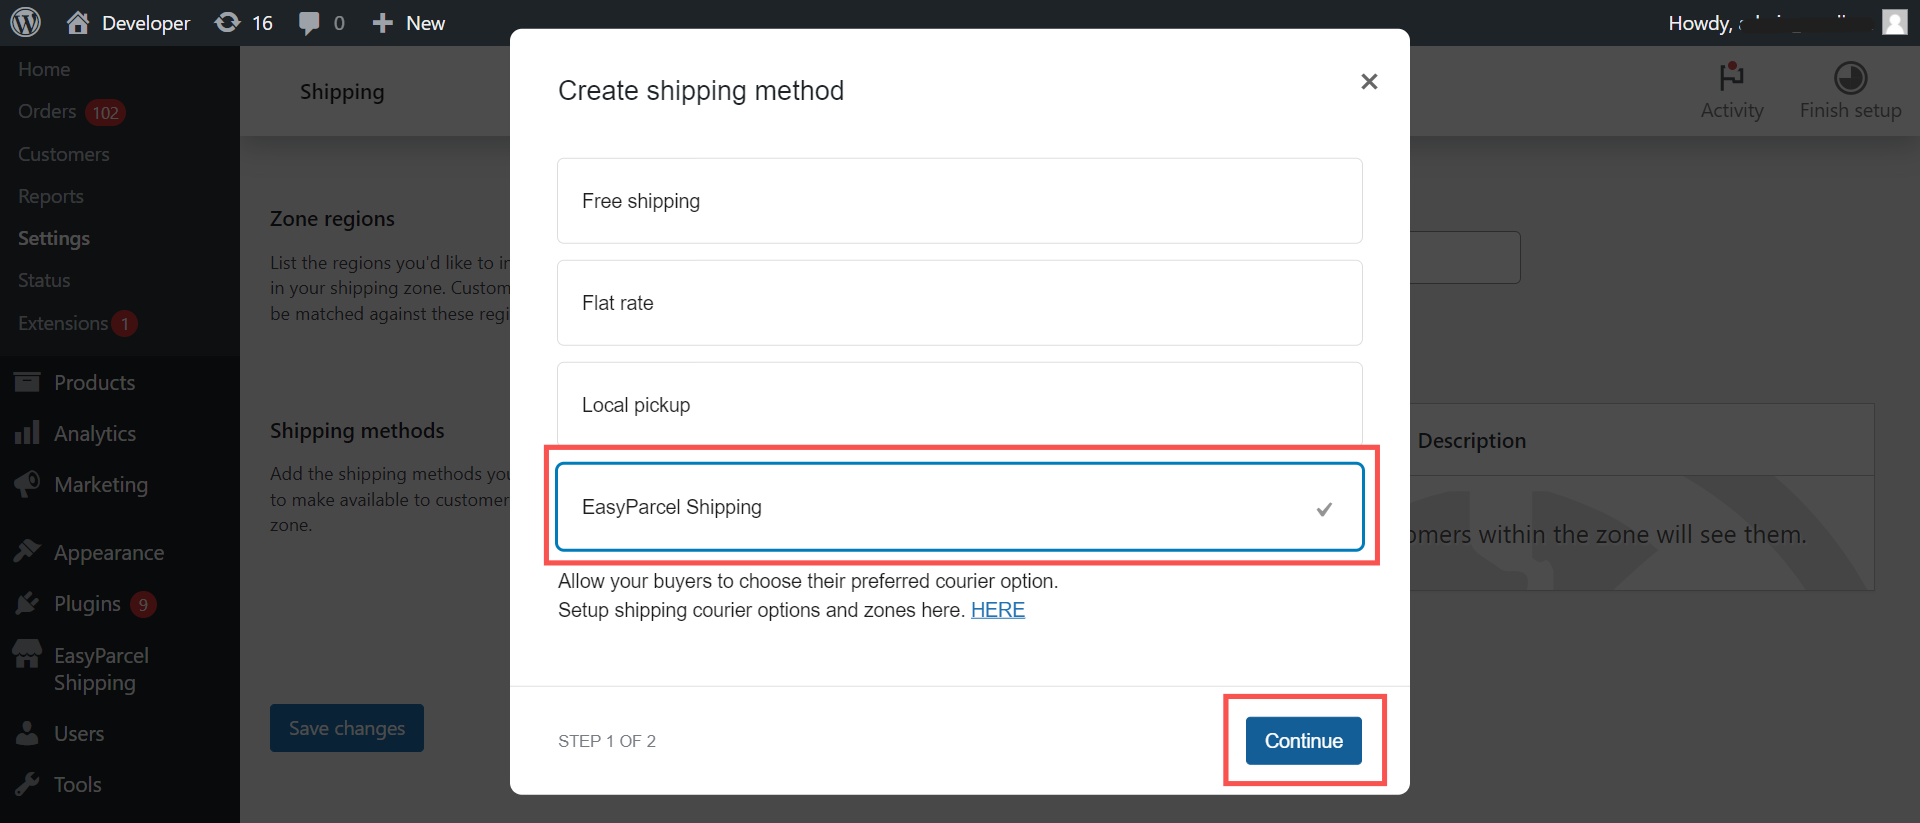
2.4: Ensure the ‘Enable’ toggle is on, then click ‘Save changes’.

Step 3: Add courier settings
3.1: Under the ‘Shipping’ tab, click ‘EasyParcel Courier Setting’ > ‘Add Courier Setting’
This enables courier integration, including live rate calculation, real-time tracking, and more. Make sure the zones match those set up in Step 2.1

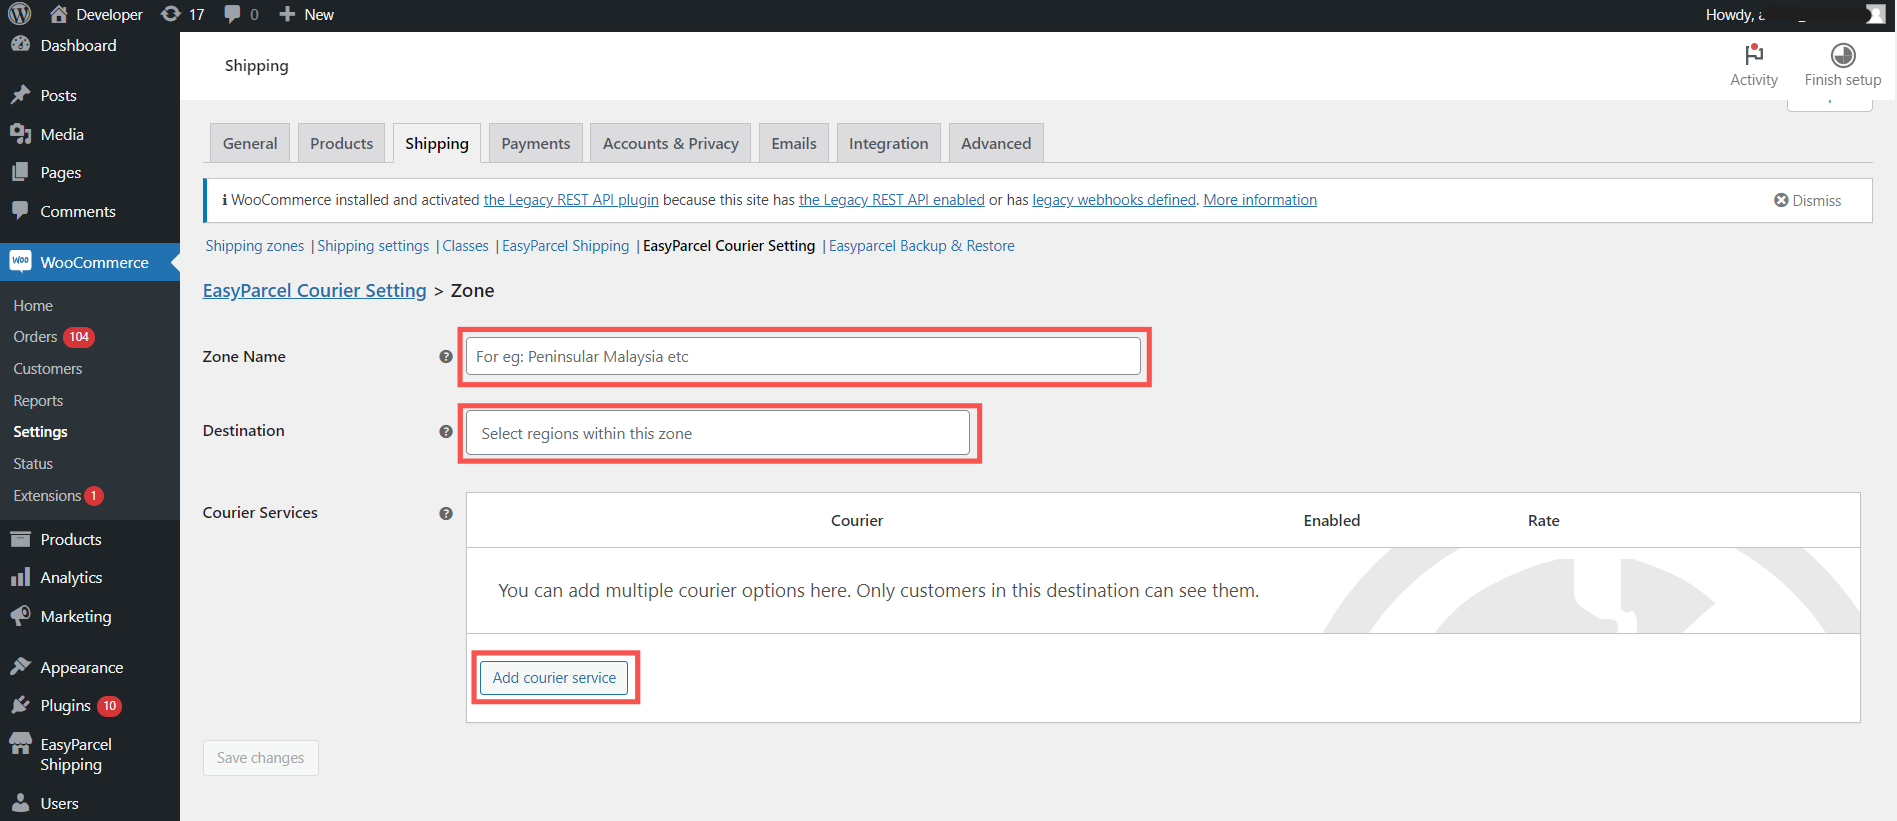
3.2: Fill in your Zone Name and Destination, then click ‘Add Courier Service’.
Step 4: Select the courier service type
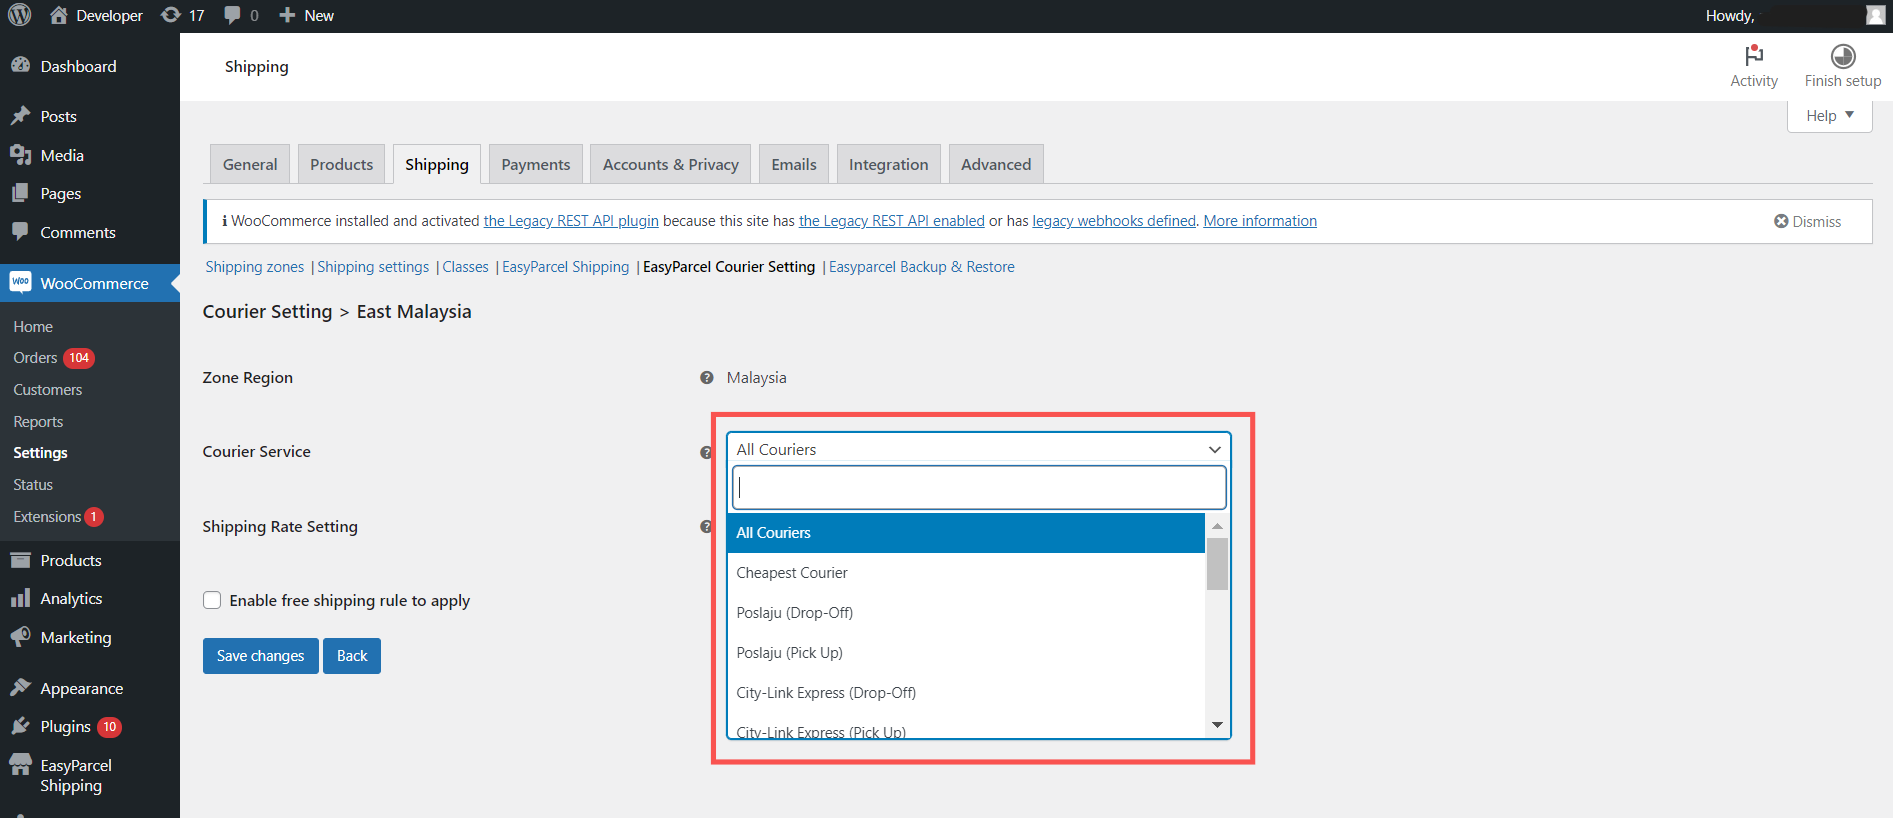
4.1: You’ll be given three options for displaying courier choices:
- All couriers,
- Specific courier,
- Cheapest courier.
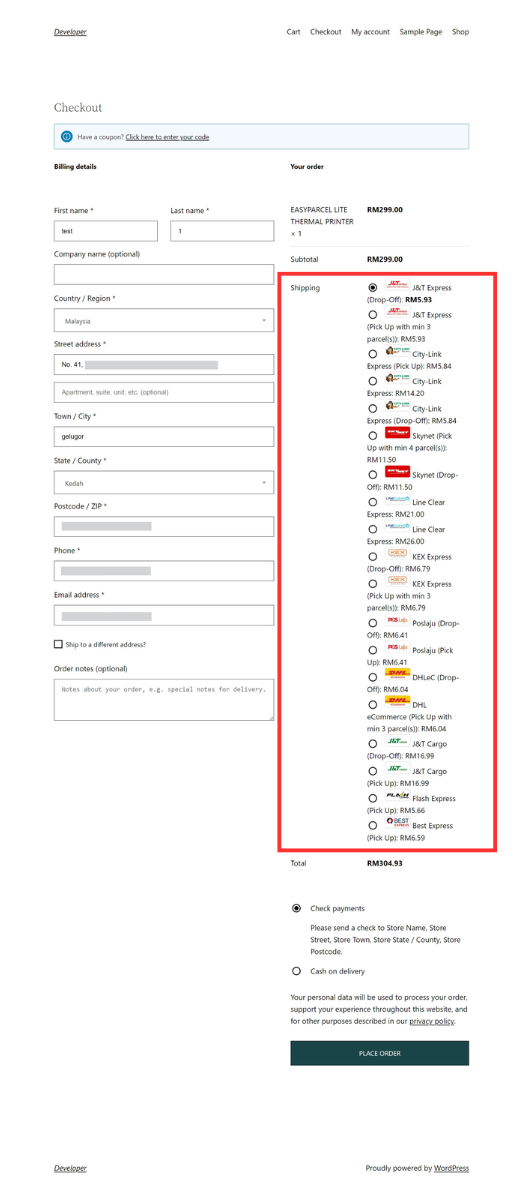
4.1a: All couriers:Displays all available couriers for the destination.
✅ Gives customers a wide range of options.
Your checkout page would look like:
4.1b: Specific courier: Select your preferred courier and customise the display name shown at checkout.
✏️ Great for businesses that rely on specific partners.

Your checkout page would look like:
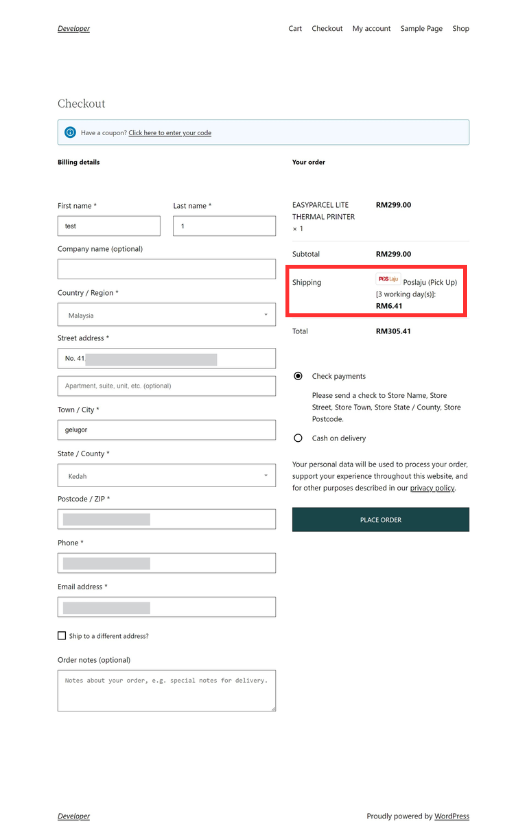
4.1c: Cheapest courier: Automatically displays the lowest-priced courier for the destination.
✅Perfect for offering customers the most affordable shipping without manual selection.

Your checkout page would look like:

Now that you've added your couriers, you can customise how shipping rates appear at checkout based on your preferred display style.
Step 5: Review & fulfill the order
5.1: Go to your WooCommerce order page and click on the specific order you wish to fulfill.
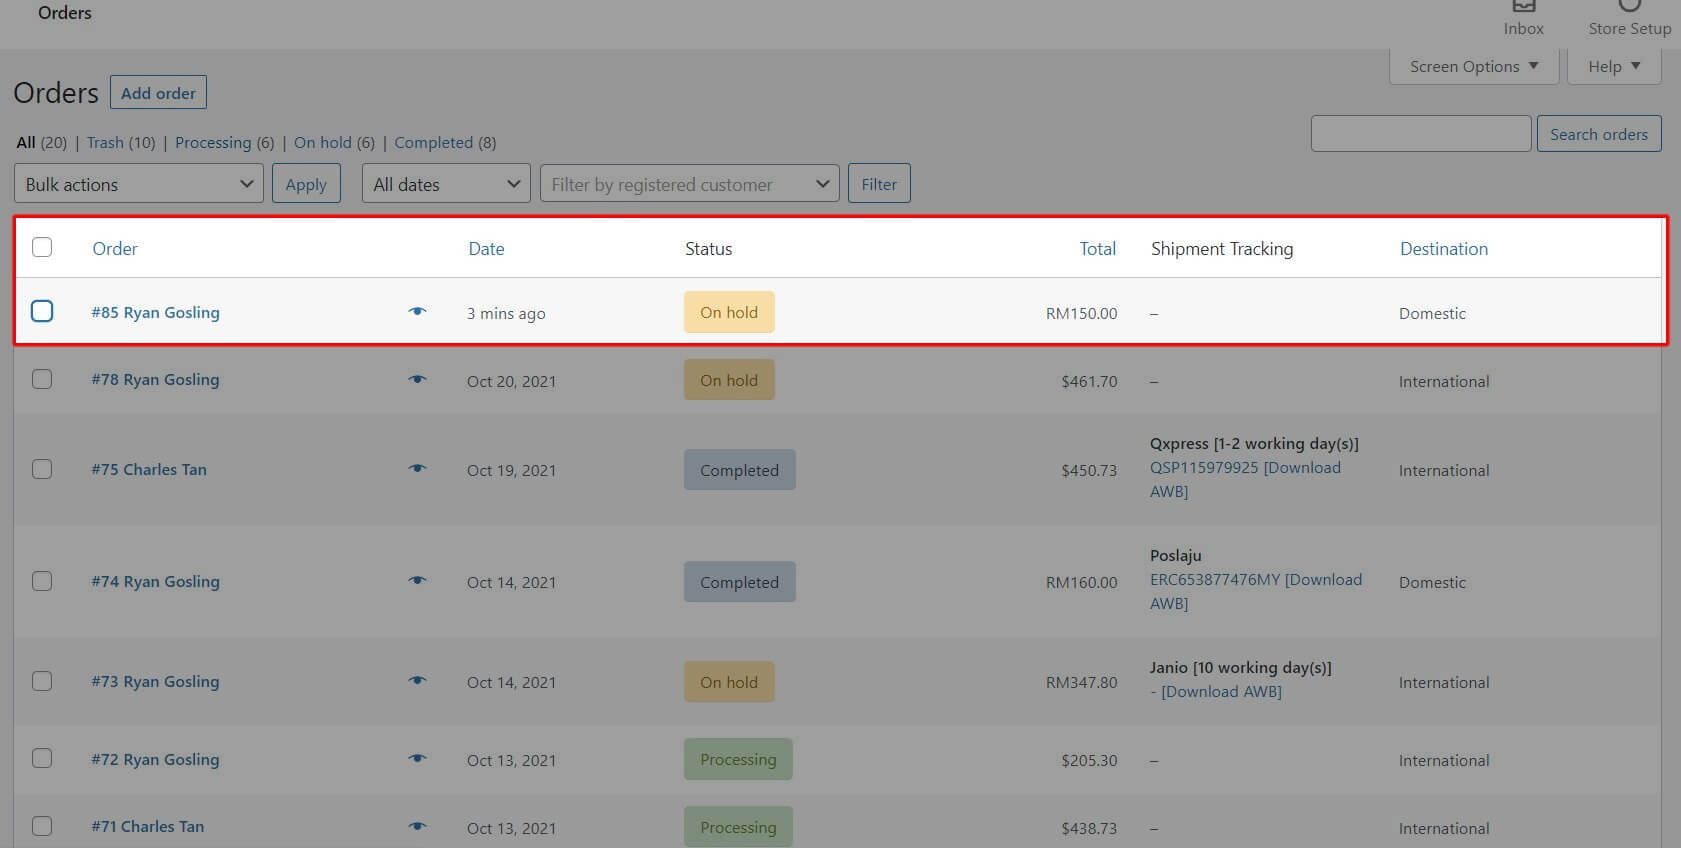
5.2: Double-check the shipping details. Once confirmed, click 'Fulfill Order' to proceed.
5.3: After the order is fulfilled, the selected courier with shipping rates and tracking number will be automatically generated in your order. You can download the AWB and attach it to your parcel for delivery.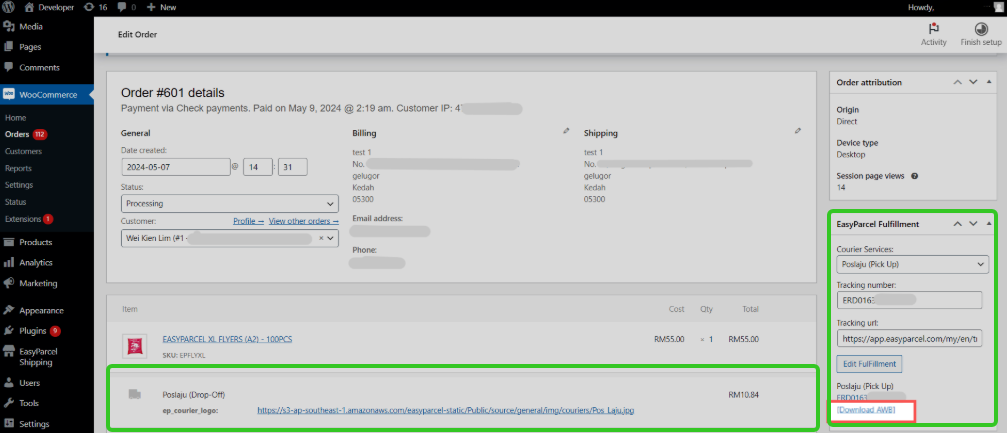
Frequently Asked Questions (FAQs)
Q1: Can I offer international shipping using the WooCommerce plugin?
Ans: Yes! WooCommerce supports international shipping. By integrating EasyParcel, you can offer live shipping rates globally. Just ensure you’ve set up the correct shipping zones and courier settings for each destination.
Q2: Can I set up different shipping methods for various countries?
Ans: Absolutely. You can create multiple shipping zones in WooCommerce and assign specific courier services to each one via EasyParcel. This allows you to offer different options for different regions.
Q3: Can I offer free shipping through WooCommerce?
Ans: Yes. WooCommerce allows you to set up free shipping rules—for example, based on a minimum order value. Do note that if you enable free shipping, you’ll need to absorb the shipping cost yourself, as EasyParcel does not cover it.
Q4: Do I need to manually update the shipping rates?
Ans: No, you don’t! With EasyParcel’s live rate feature, shipping rates are updated automatically based on real-time courier data. Just make sure your EasyParcel account is properly integrated with WooCommerce.
Q5: Can I offer same-day or on-demand delivery with live rates?
Ans: Yes, you can set up expedited shipping options such as same-day delivery or next-day delivery, depending on the couriers available in your region. These services will also display their corresponding live rates during checkout.
Q6: What should I do if live shipping rates aren’t showing on the checkout page?
Ans: If live rates are not showing, first check your EasyParcel integration and shipping zone setup. Ensure your shipping zones match the regions you want to ship to and that the EasyParcel plugin is properly activated.
And there you have it! You've just mastered integrating EasyParcel with WooCommerce. We're really excited for you! We hope this guide was helpful but if you still have questions, don't worry – we've got you covered. Check out our other articlesor reach out to our friendly support team. We're happy to help you every step of the way!