We'll Cover:
1. Introduction
If you’re looking to integrate EasyParcel with your WooCommerce store, this article provides a comprehensive step-by-step guide to assist you through the process.
Why do you need to integrate with EasyParcel
✔️ Compare 60+ courier services:
Easily find and choose the best courier options for your business needs and customer locations.
✔️ Cheapest Courier Option:
Display the most affordable courier at checkout to cut costs and boost customer satisfaction.
✔️ Bulk Order Fulfillment:
Fulfill multiple orders quickly with your chosen couriers.
✔️ Live rate at checkout:
How real-time EasyParcel rates at checkout. No manual updates needed.
✔️ Customize Shipping Rates:
Set personalized shipping rates to stay flexible and in control.
✔️ Auto-generate bulk shipping label:
Create multiple shipping labels in one go to reduce manual work and minimize errors.
✔️ Automated tracking number notification:
Keep your customers updated automatically with tracking details and reduce support inquiries.
2. Start Integrating and Choose Your Preferred Fulfillment Method
There are two methods available for order fulfillment: Import Version and Plugin Version.
- Plugin Version: Fulfill orders directly within your WooCommerce store. This method offers a more seamless and integrated experience compared to the Import Version.
- Import Version: Import and fulfill your WooCommerce store orders directly through EasyParcel.
Here are the steps to guide you on how to integrate your EasyParcel Plugin in your WooCommerce:
Before you begin, make sure you have an EasyParcel account.
→ New to EasyParcel? Sign up for free here.
→ Already have an account? Log in to get started here.
2.1 Plugin Version (Seamless) - Highly Recommend
Highly recommend selecting EasyParcel Plugin in your WooCommerce, it enables:
- Display live shipping rates on your checkout page. Learn More
- Fulfill WooCommerce orders directly through the EasyParcel Plugin (single or multiple orders). Learn More
- Automate WooCommerce order fulfillment with preset couriers, automatic AWB generation, and tracking. Learn More
- Automatically update WooCommerce order status to 'fulfilled' after fulfilling via EasyParcel. Learn More
- Enable WooCommerce add-on services directly through the EasyParcel plugin settings. Learn More
Step 1: Set up WooCommerce integration in EasyParcel
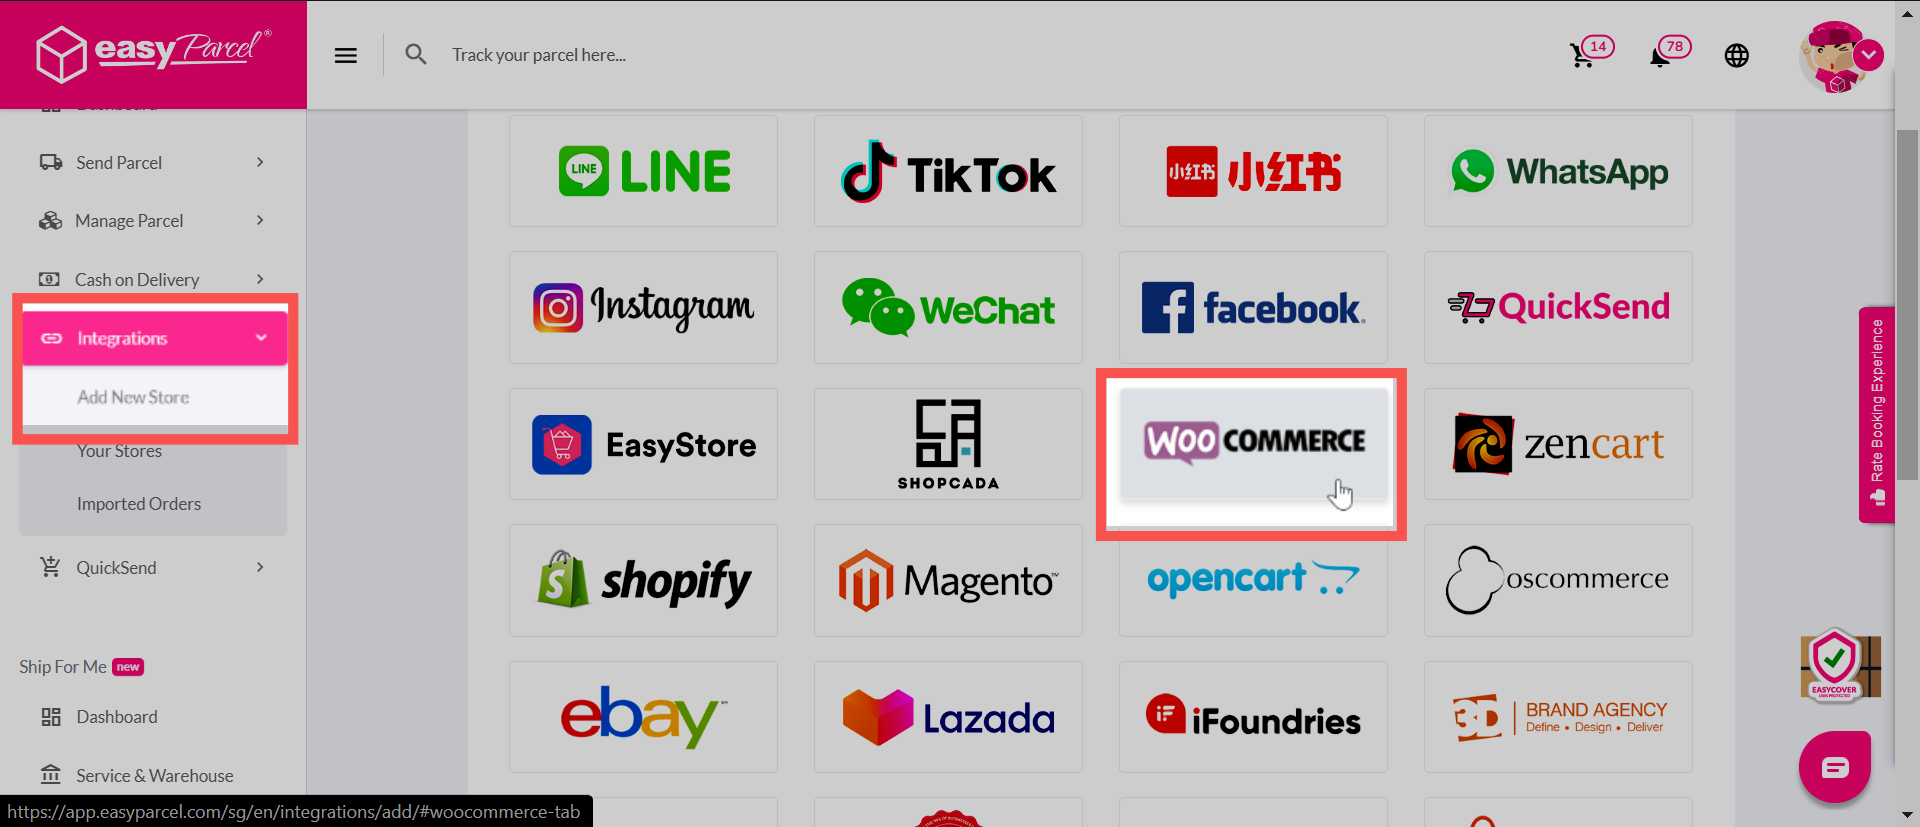
1.1: Go to 'Integration' > 'Add New Store' > select 'WooCommerce'.
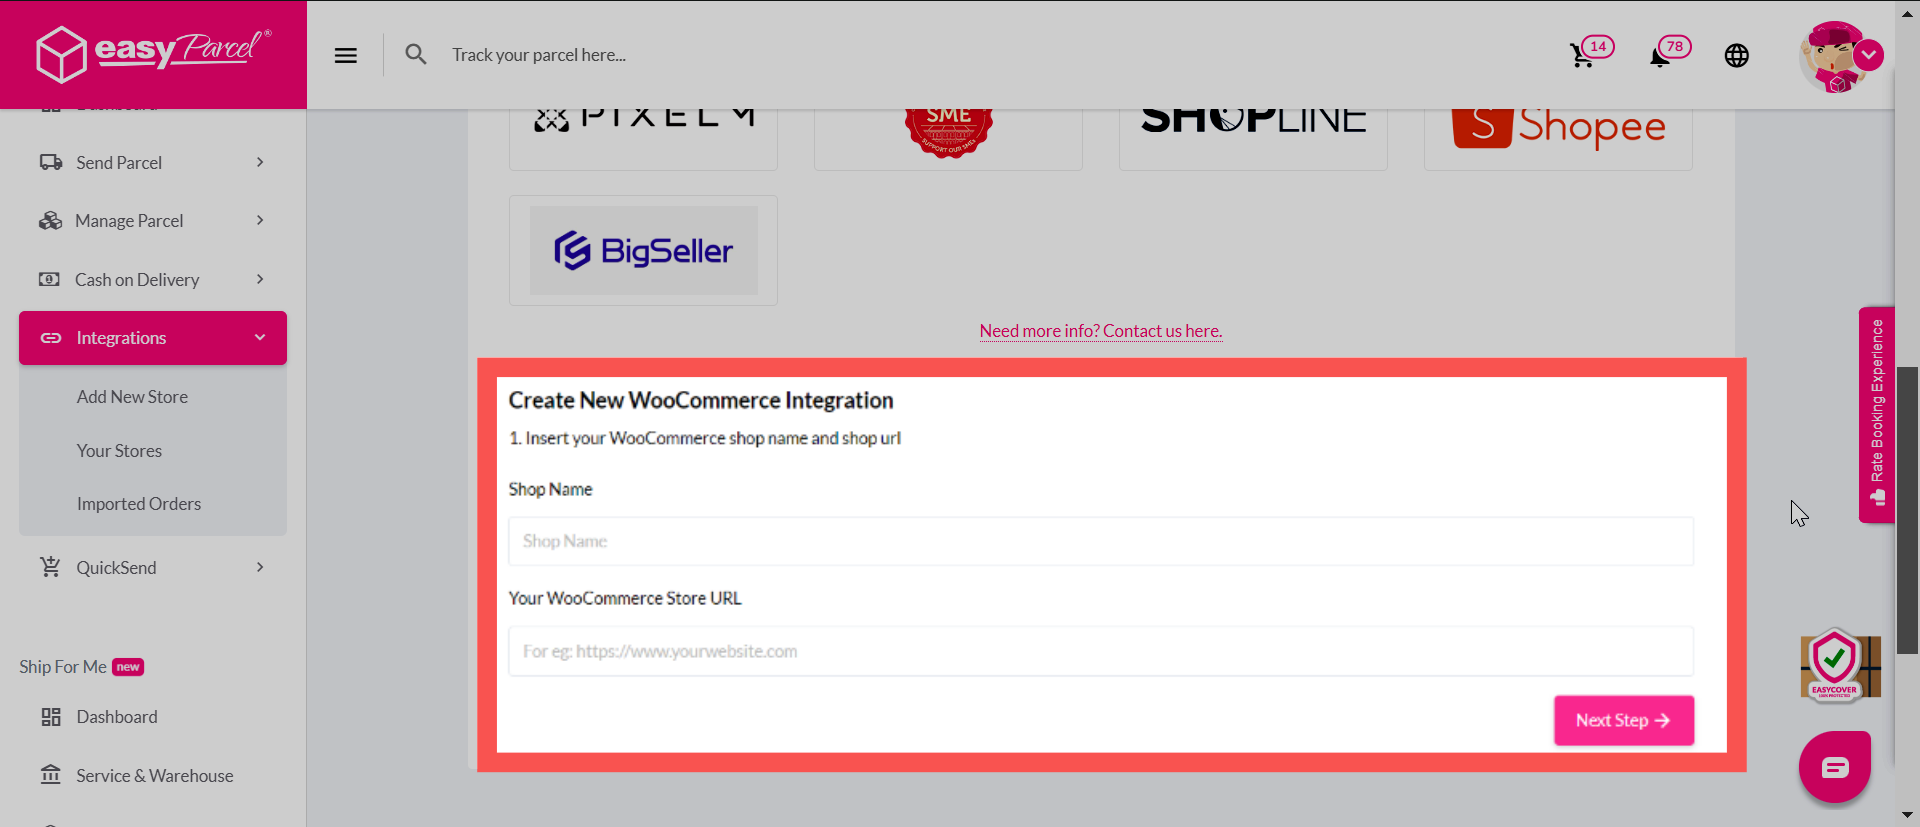
1.2: Enter your Shop Name and your WooCommerce store URL, then click Next Step.
1.3: Under the Plugin Version (Seamless) tab, click Submit.

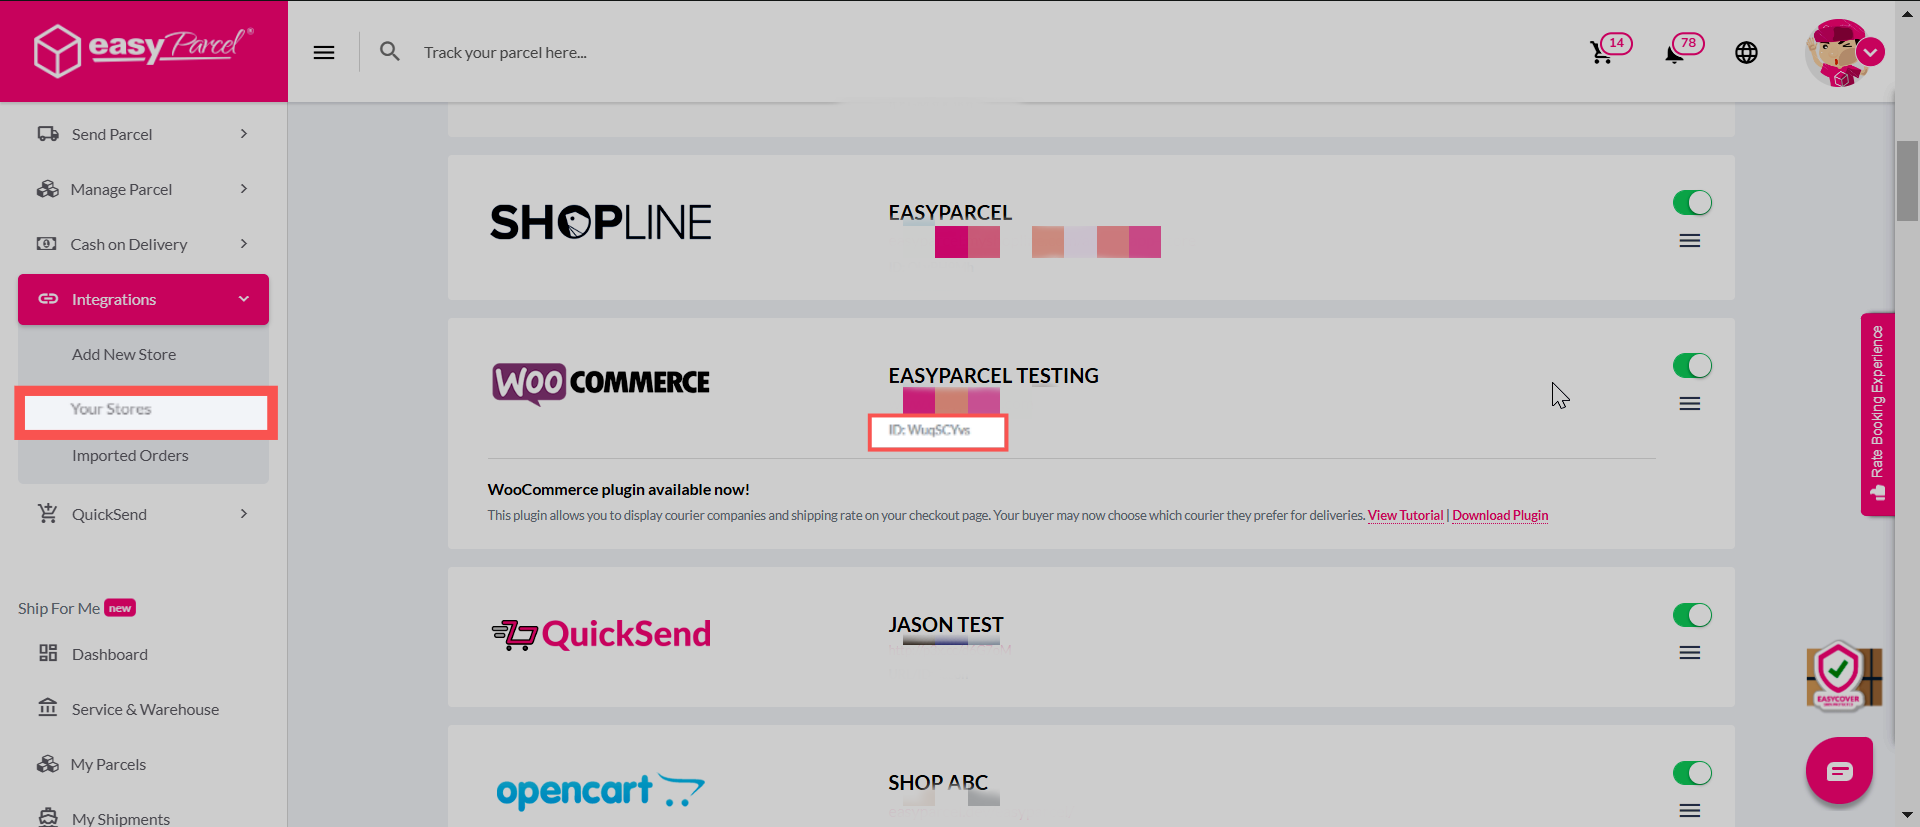
1.4: Click Your Stores and make sure your WooCommerce is Activated. After that, copy the integration ID.
Step 2: Install and activate EasyParcel plugin on your WooCommerce
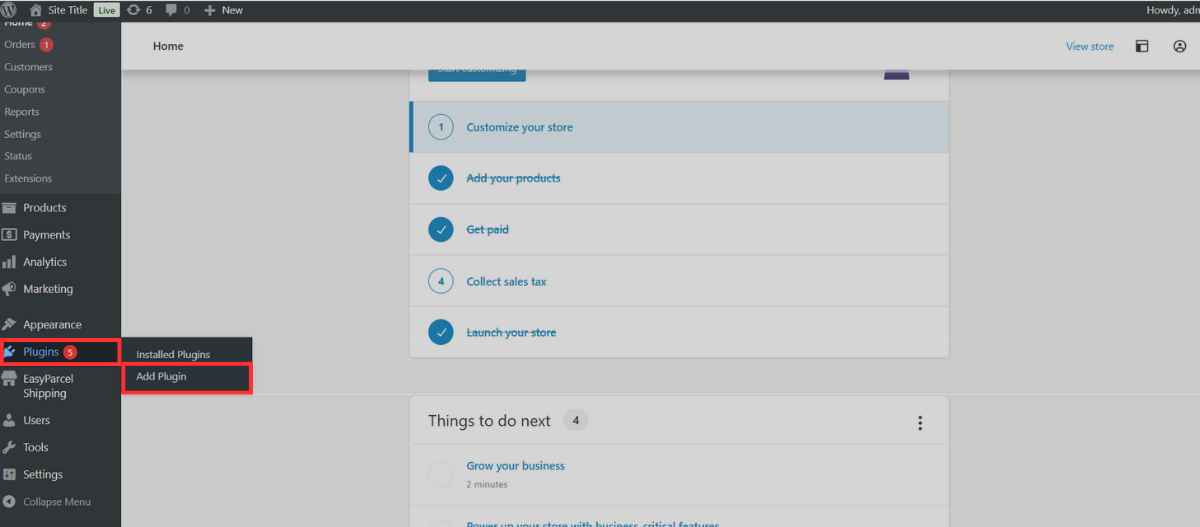
2.1: In your WooCommerce admin, go to Plugins > Add Plugin.
2.2: Search for EasyParcel Shipping > click More Details to check the version.
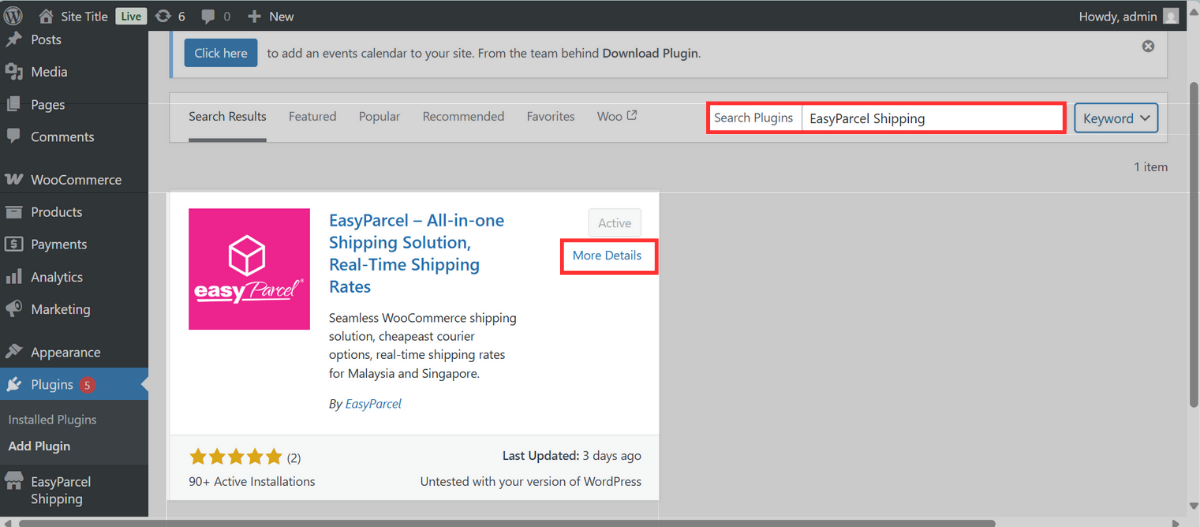
2.3: Locate the latest version, click Active to activate EasyParcel Shipping.

Step 3: Set up EasyParcel Shipping details on WooCommerce
After activating your EasyParcel Shipping plugin, you need to set up your EasyParcel Shipping details in your WooCommerce admin panel:
3.1: Navigate to EasyParcel Shipping > Fill in all the required information.
*Paste the Integration ID that you have copied from Step 1.4 into the column.
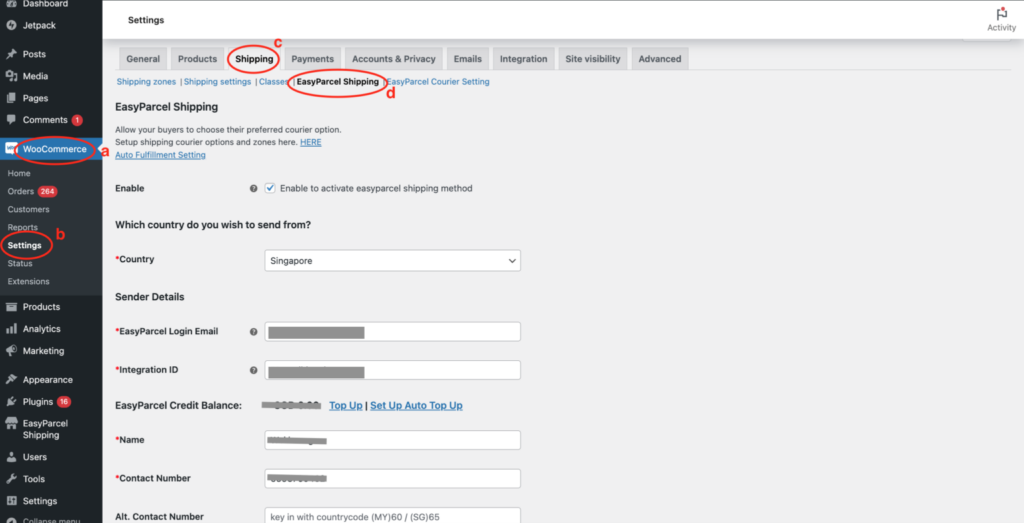
3.2: You can follow this guide to configure your EasyParcel shipping settings in your WooCommerce.
2.2 Import Version
Importing your WooCommerce orders into EasyParcel and fulfilling them with our shipping solutions.
- Display live shipping rates on your Shopify checkout page. Learn More
- Auto-merge imported WooCommerce orders. Learn More
- Automate import paid but unfulfilled WooCommerce orders into the EasyParcel platform.Learn More
Step 1: Generate your WooCommerce API keys
1.1: Go to ur WooCommerce settings, click Advanced tab > REST API > Add key.

1.2: Add a Description for the key, choose Permissions to Read/Write, and click Generate API key.
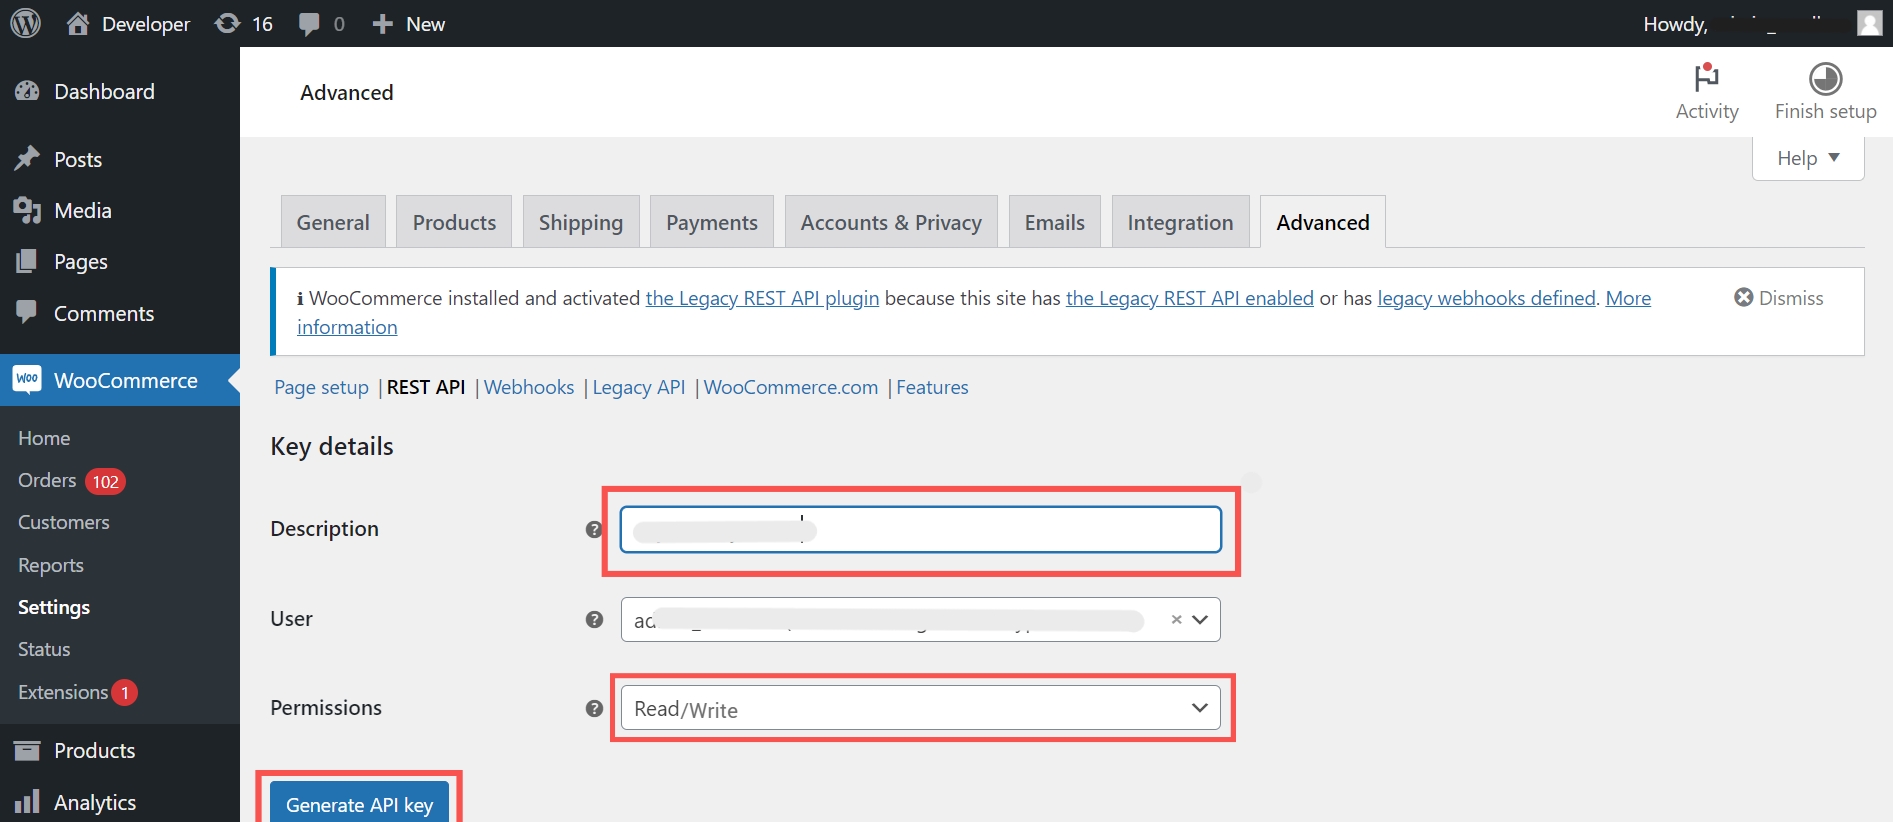
1.3: Once created, copy the Consumer key and Consumer secret for later use.
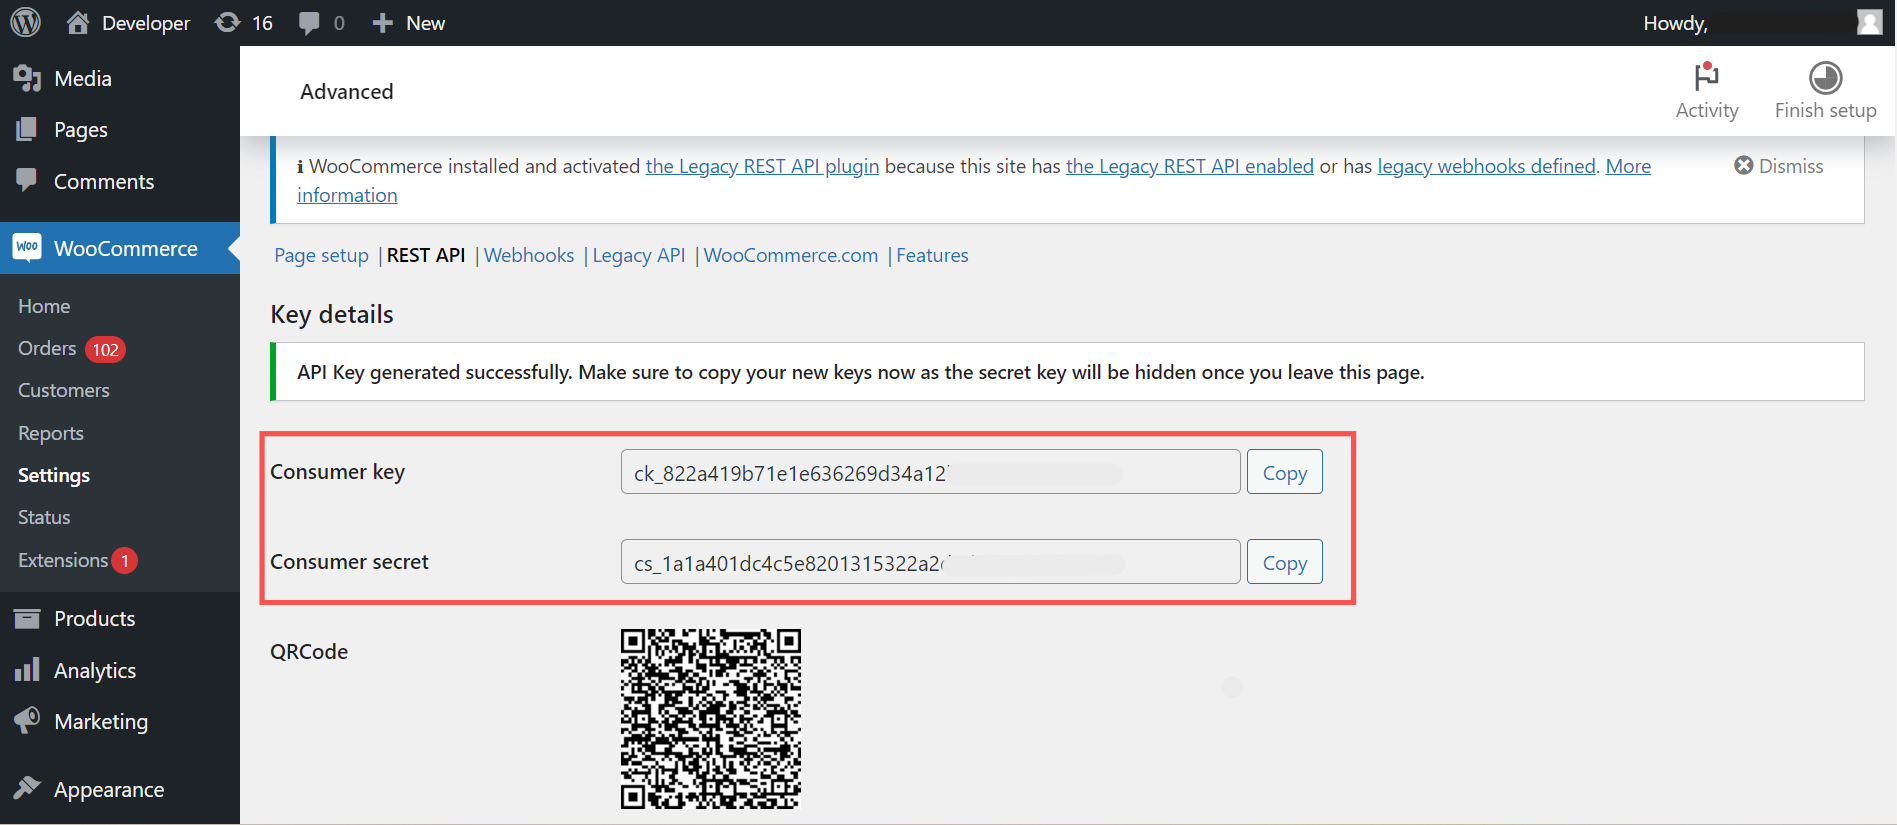
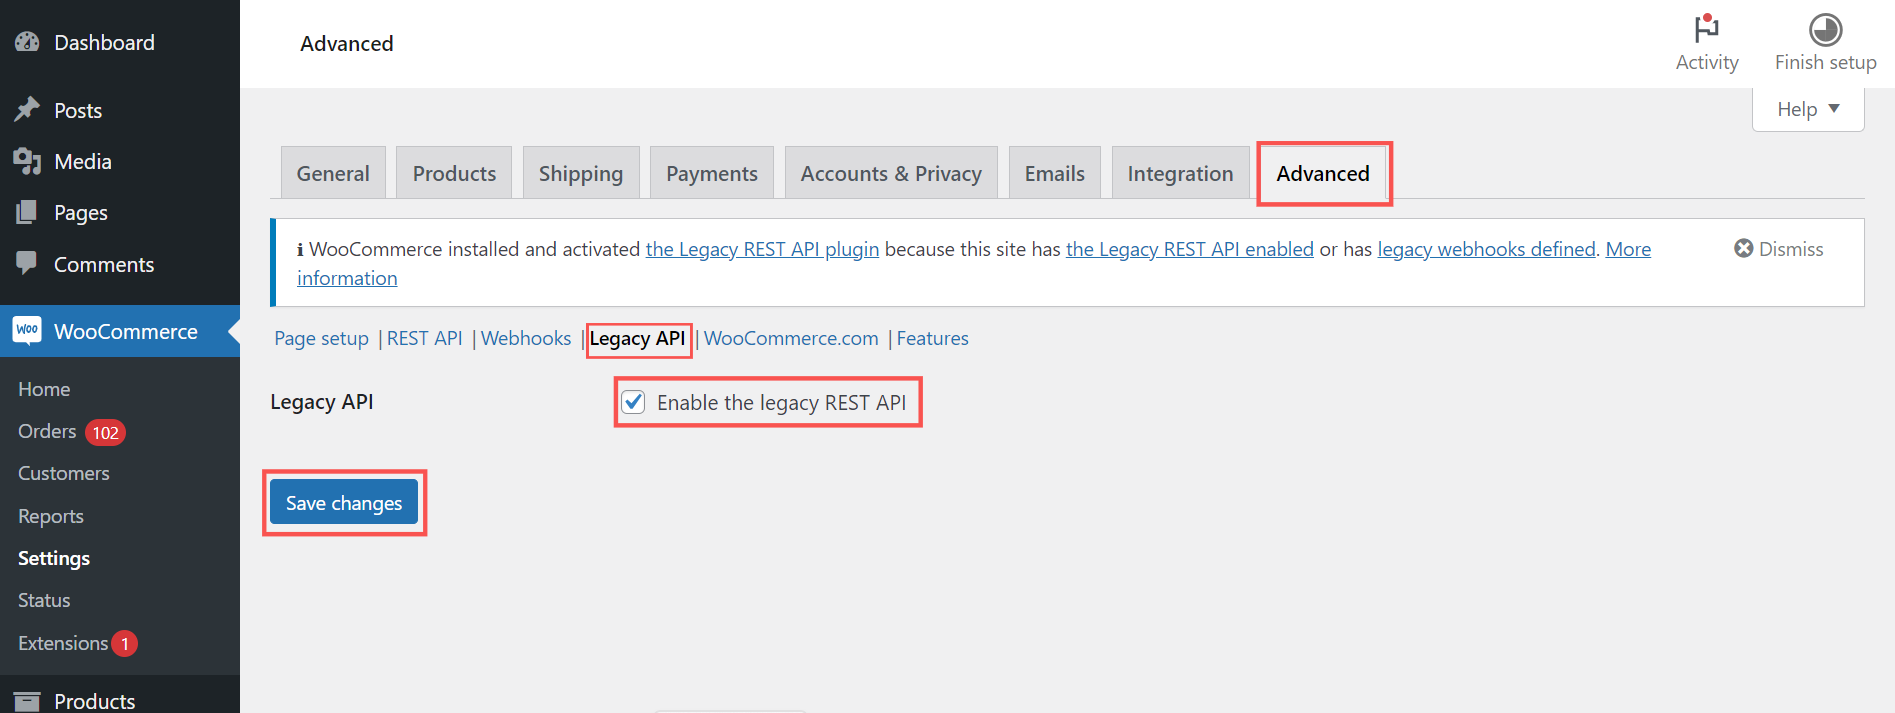
1.4: Go to your WooCommerce settings, click on the Advanced tab, click Legacy API, click to enable the legacy REST API, then click Save Changes.
Step 2: Set Up WooCommerce Integration
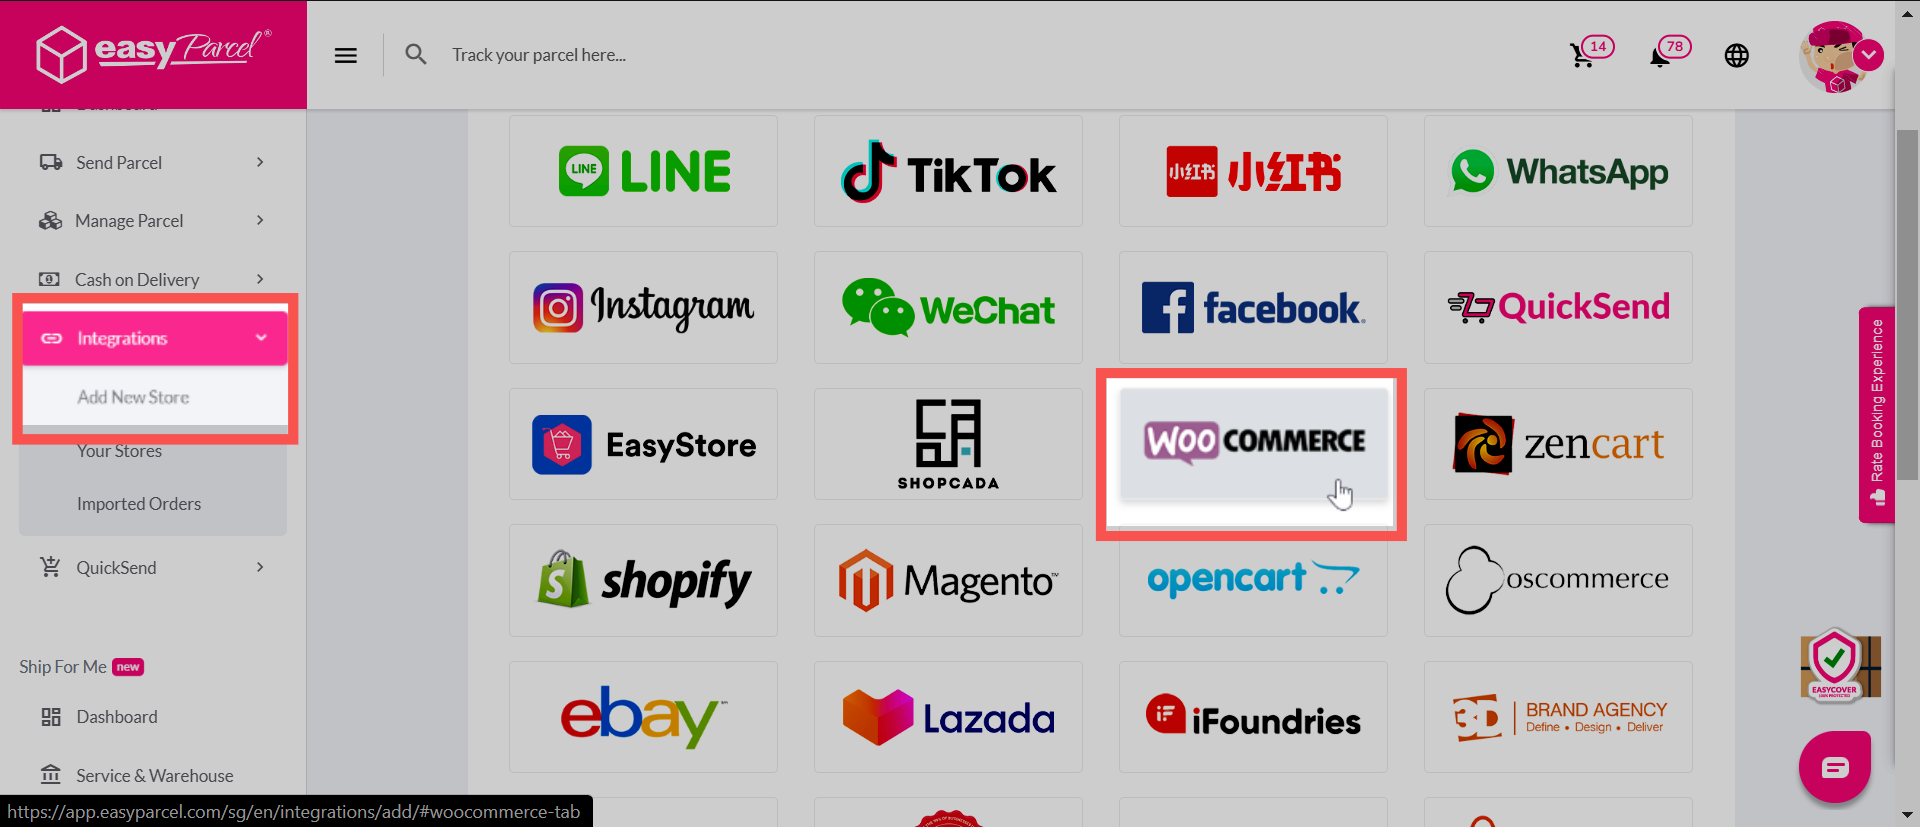
2.1: Navigate to Integration > Add New Store > click WooCommerce.
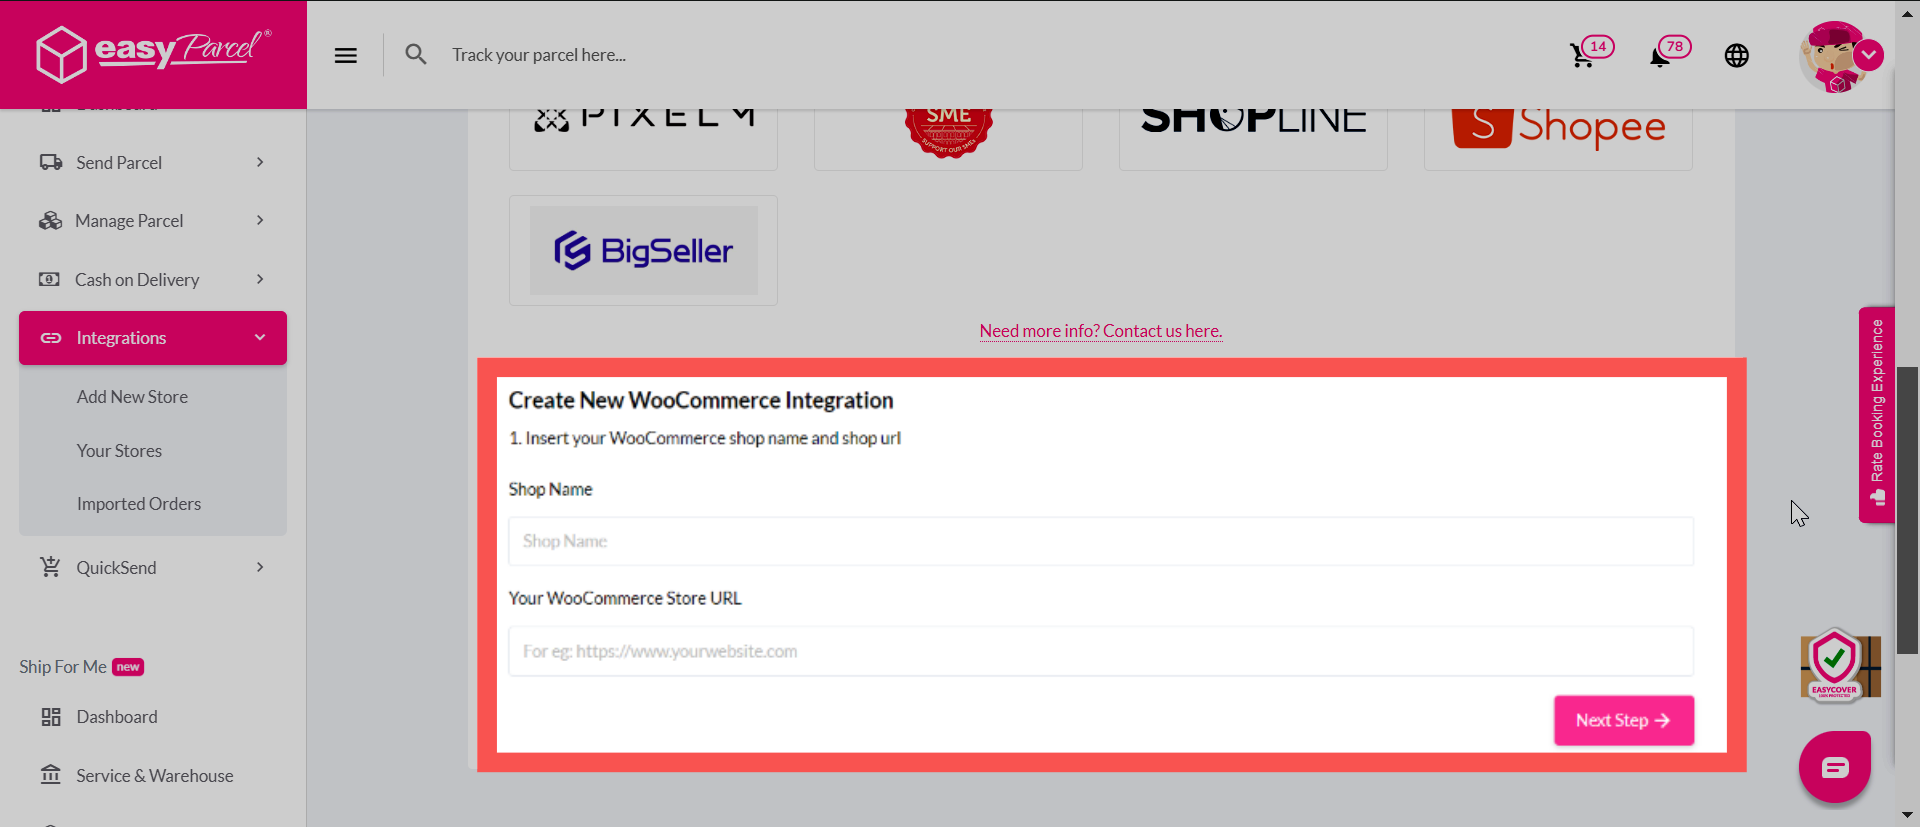
2.2: Fill in your Shop Name and your WooCommerce Store URL, then click Next Step.
Step 3: Complete integration on EasyParcel
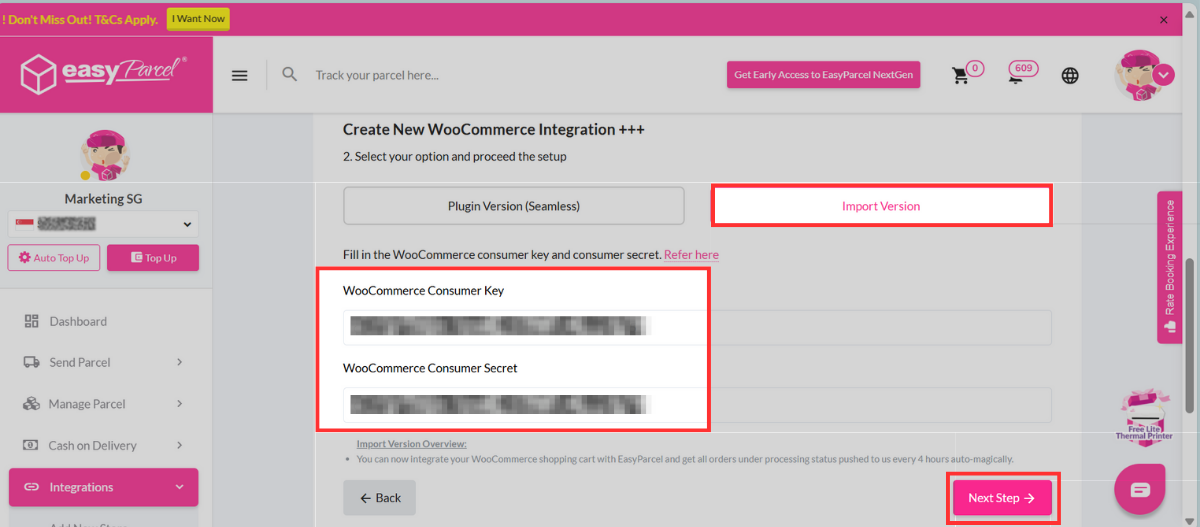
3.1: Return to your EasyParcel account, choose Import Version, and paste the Consumer Key and Consumer Secret into the provided fields, then click Next Step.
3.2: Choose your preferred Weight Unit, Auto Import, Auto Merge.
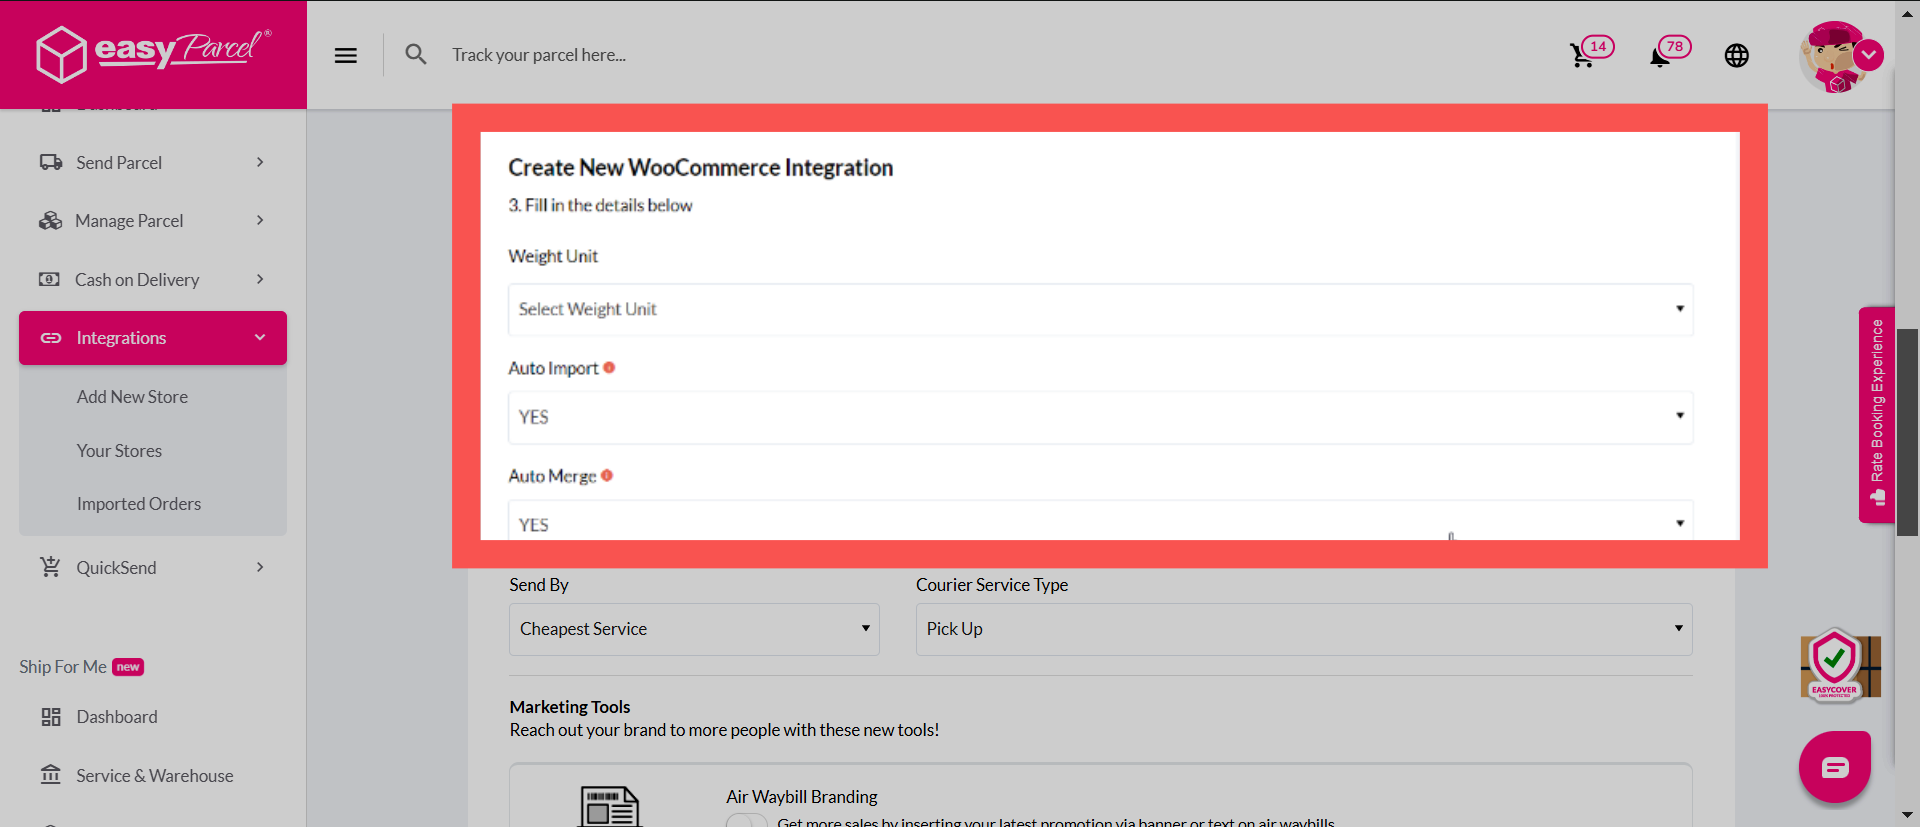
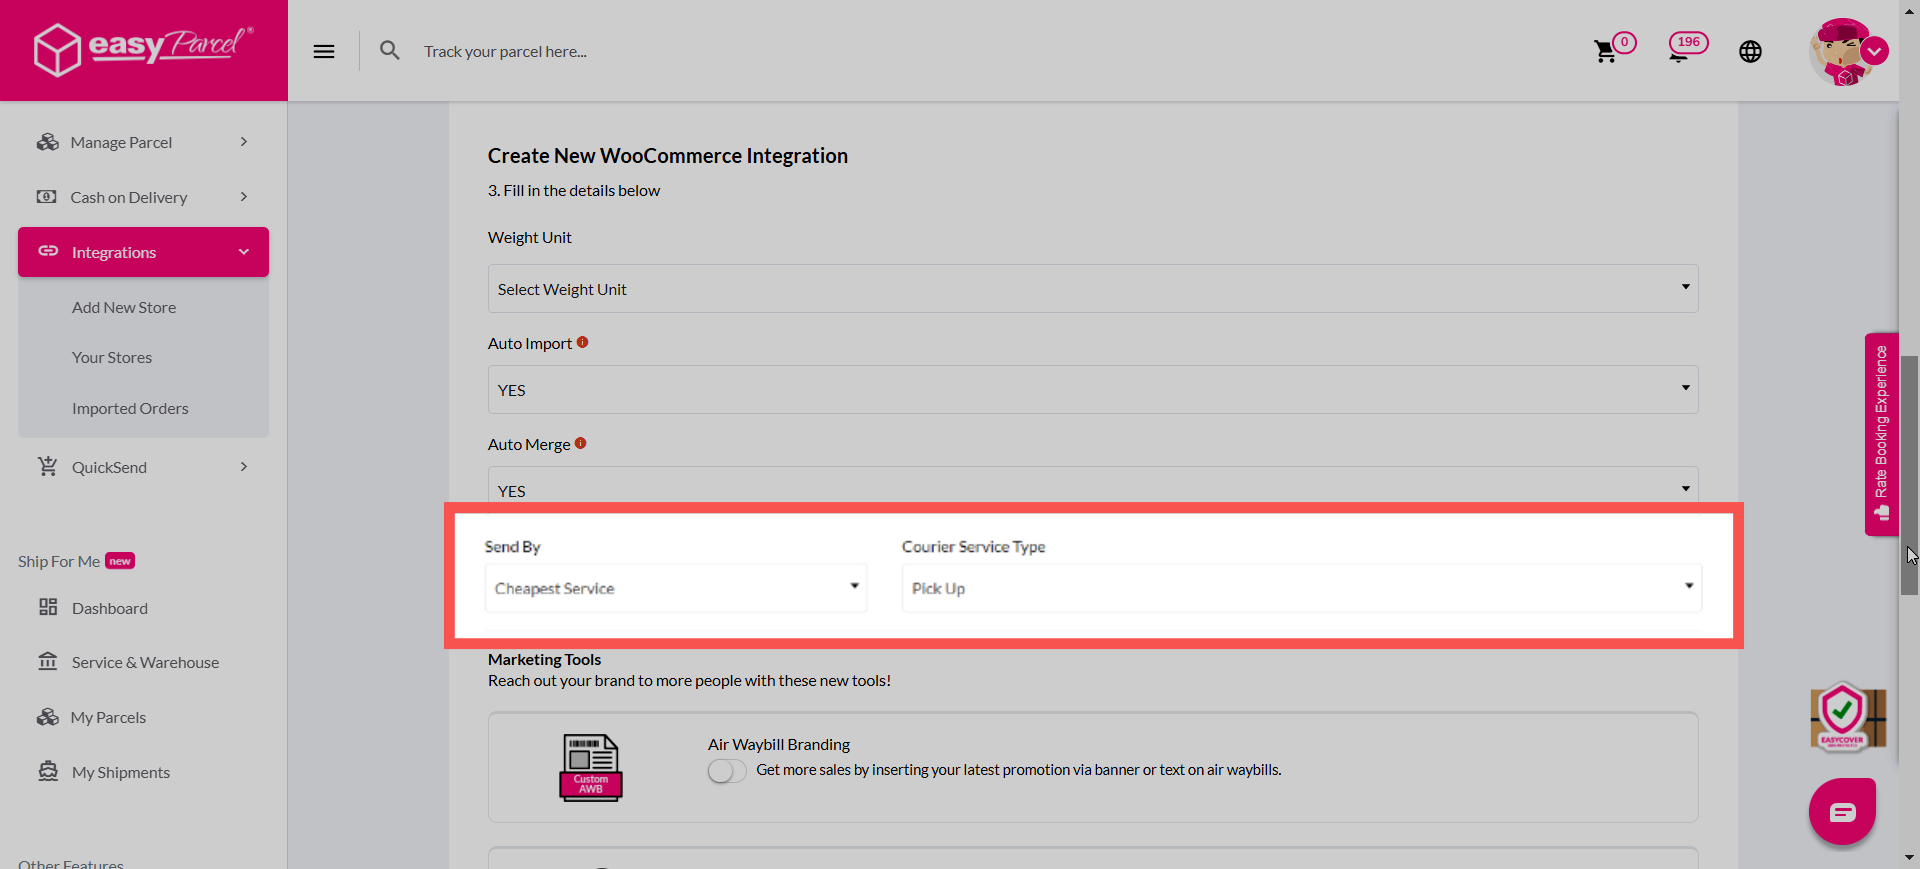
3.3: Select courier preferences, choose how shipping options are shown at checkout:
3.3a: Cheapest Service
Automatically selects the lowest-priced service for each destination. Pickup service will be used.
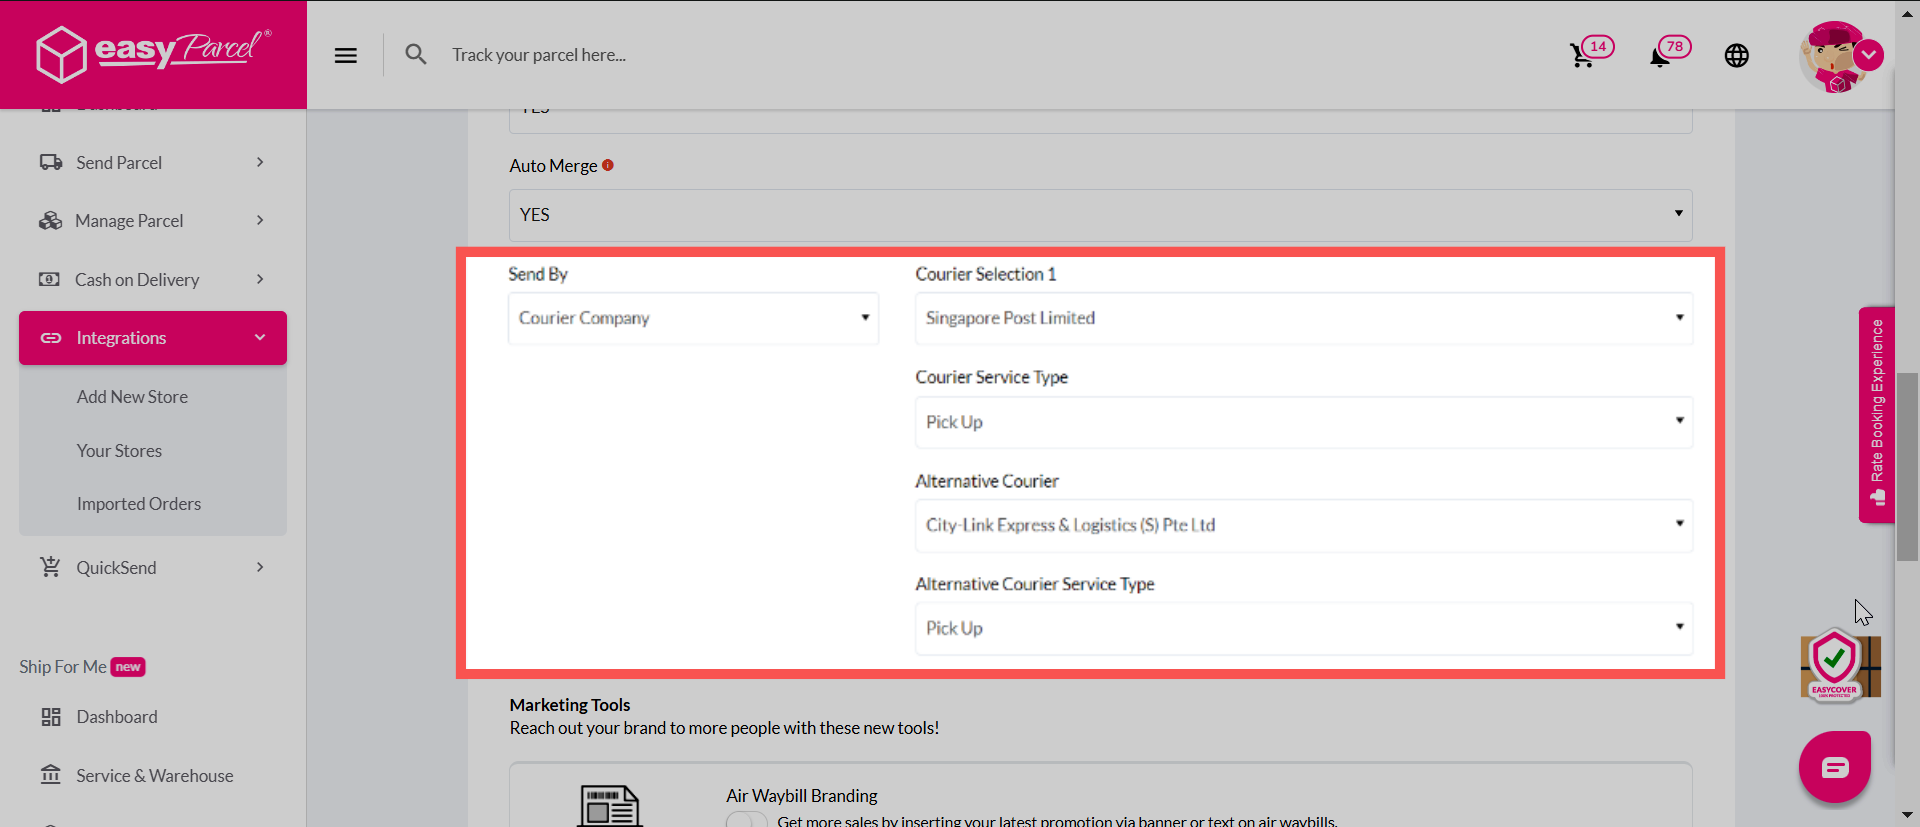
3.3b: Courier Company
Manually choose your preferred main courier and alternative courier, including their respective service types.
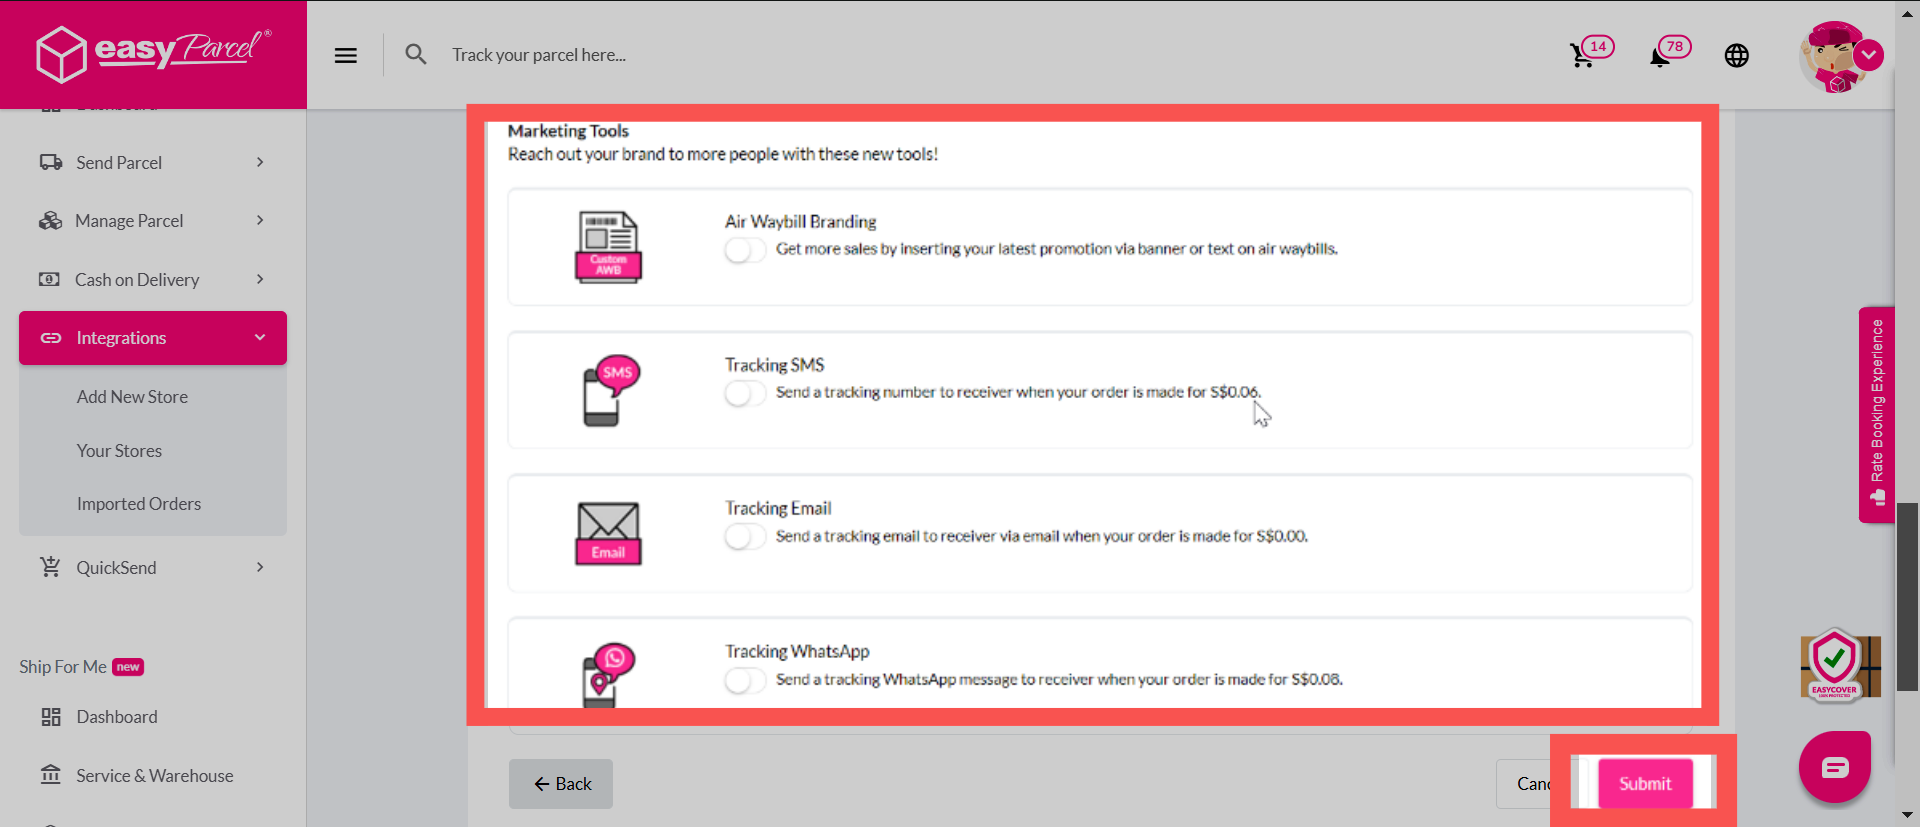
3.4: Enable Marketing Tools to boost delivery engagement, then click Submit.
Note: You may learn more on what marketing tools are available at EasyParcel and how they can help your brand.
3.5: Your WooCommerce store is now successfully added to EasyParcel
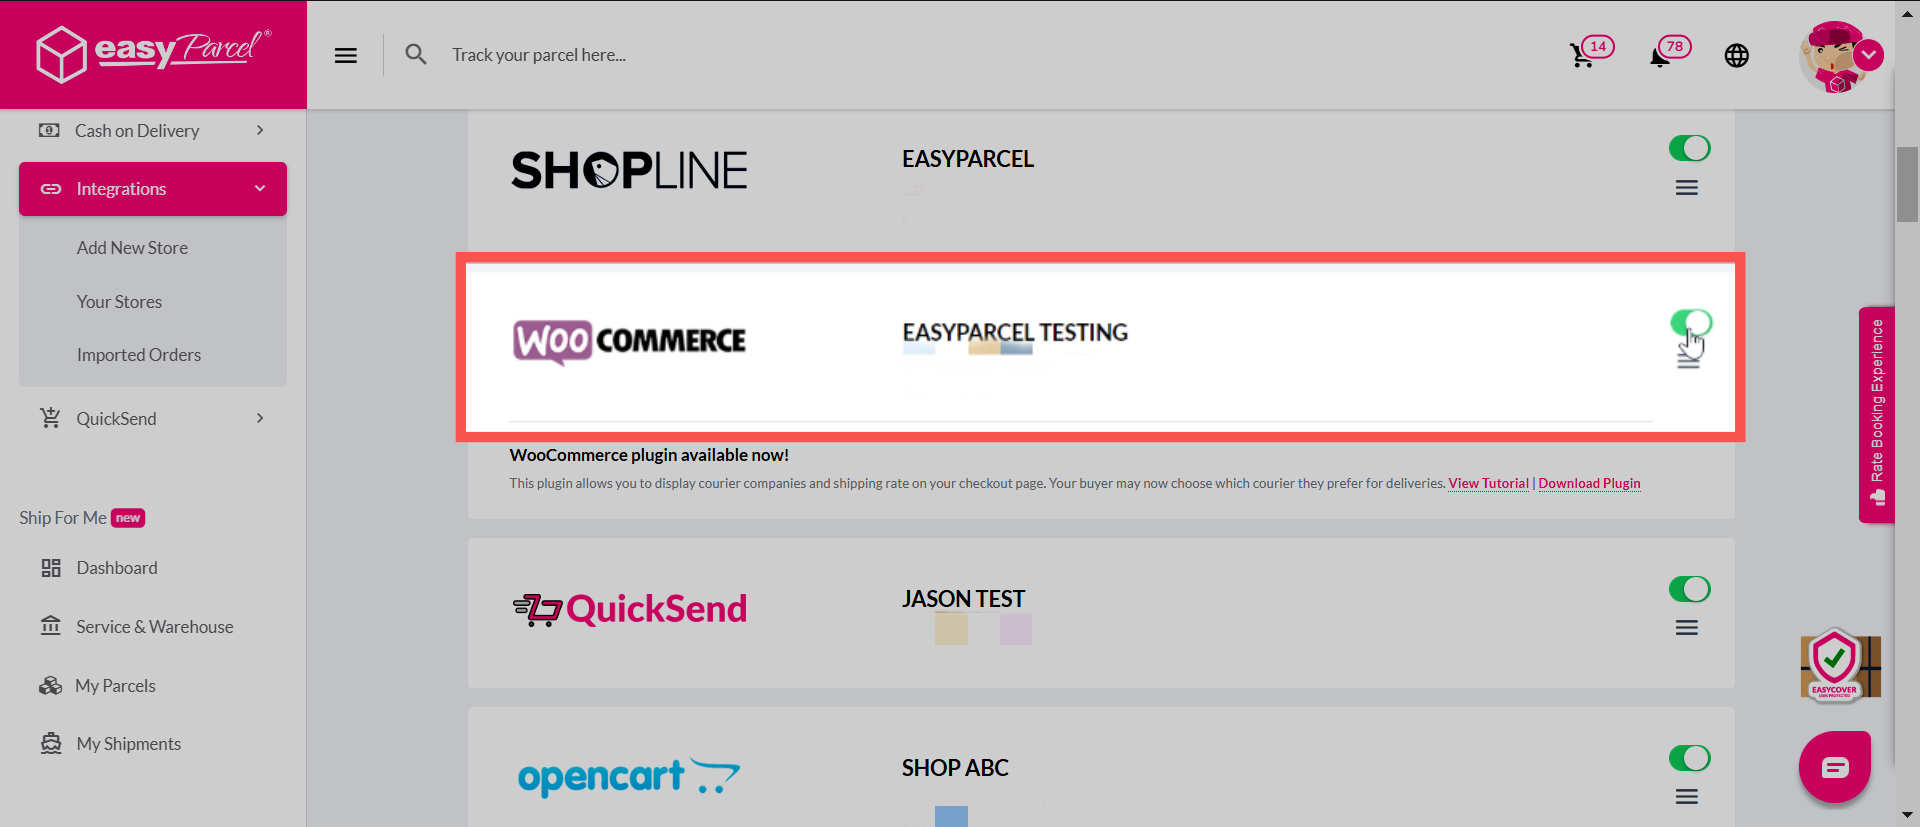
Make sure the import button is enabled to start syncing your orders.
And there you have it! You've just mastered integrating EasyParcel with WooCommerce. We're really excited for you! We hope this guide was helpful but if you still have questions, don't worry – we've got you covered. Check out our other articlesor reach out to our friendly support team. We're happy to help you every step of the way!
